There is a specific kind of magic that happens when high-heat cast iron meets a thick, amber-hued Japanese BBQ sauce. This japanese bbq chicken fried rice isn’t just a meal; it’s a sensory experience that brings the “hibachi” steakhouse energy directly into your home kitchen.
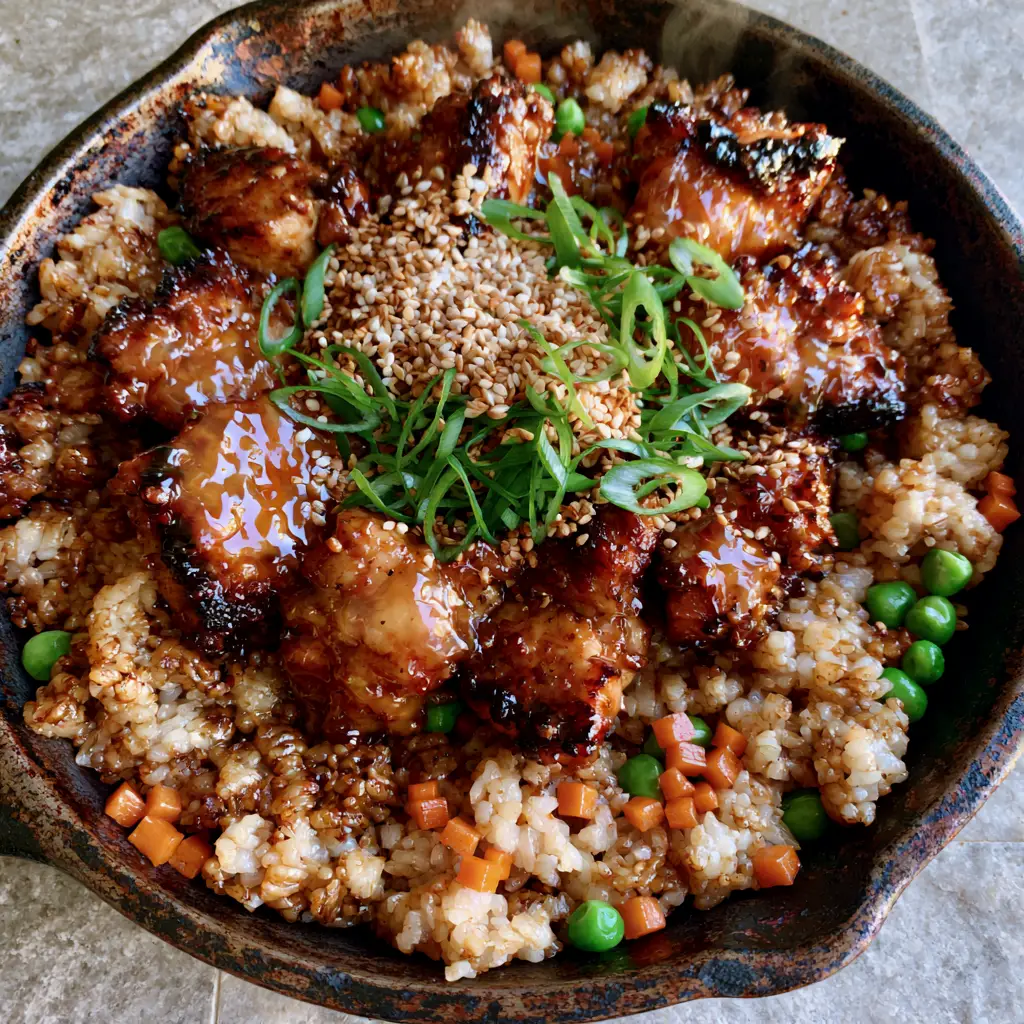
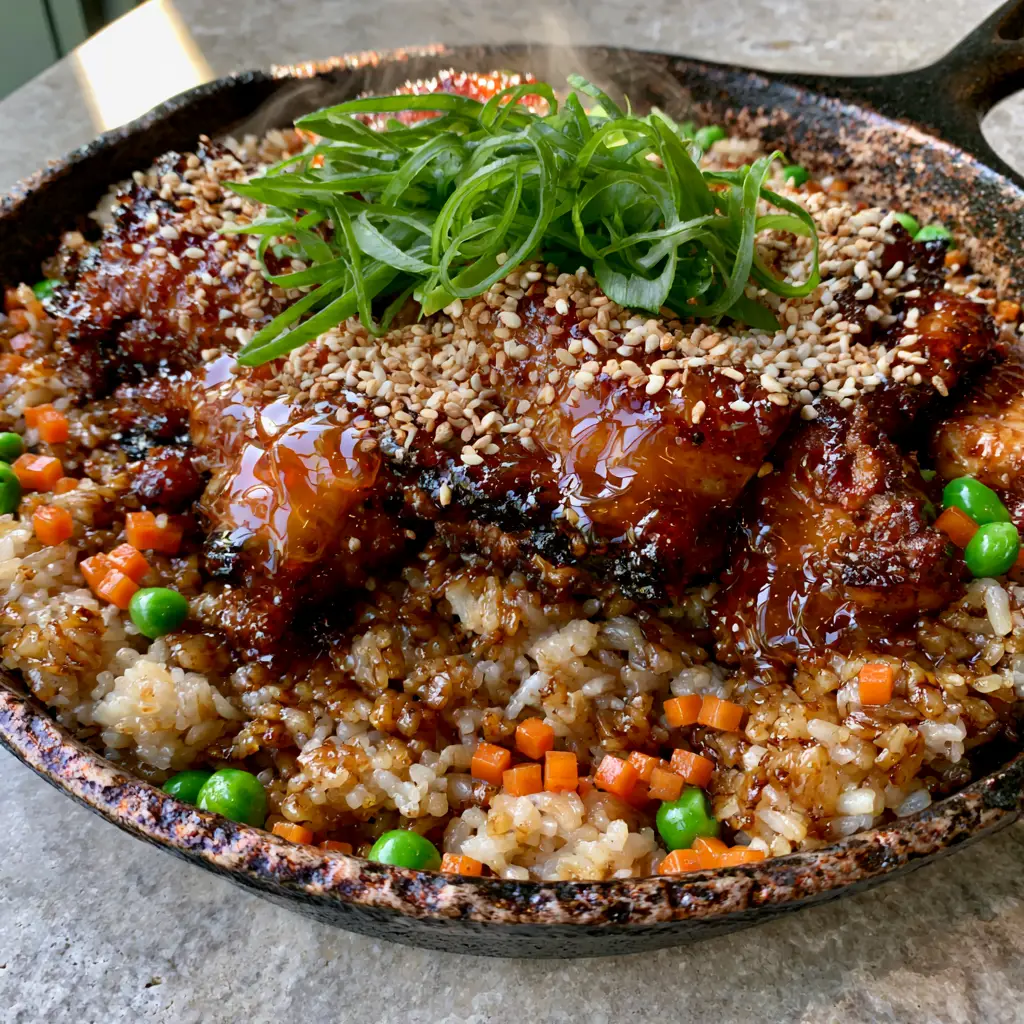
The star of the show is the contrast between the deeply seared, caramelized chicken thigh chunks and the light, airy, soy-seasoned grains of rice. Every bite delivers a balance of salty-sweet umami, punctuated by the snap of bright green sweet peas and the crunch of toasted sesame seeds.
Whether you are craving a weeknight upgrade or a weekend culinary project, this recipe focuses on professional techniques to achieve that signature “char” and “glisten” seen in the world’s best street food photography. Let’s dive into the science of the perfect stir-fry.
The Anatomy of the Perfect Yakiniku Stir-Fry
- Visual Contrast: The vibrant orange carrot micro-cubes and bright green peas provide a “pop” against the golden-brown soy rice.
- Textural Harmony: We achieve fluffy rice with distinct grains—never mushy—thanks to the use of chilled, day-old rice.
- The Maillard Reaction: By using a rustic cast iron skillet, we create those sought-after charred caramelized meat edges that define authentic BBQ.
- Glistening Finish: A translucent amber Yakiniku glaze coats the chicken, catching the light and locking in moisture.
Essential Elements for This Japanese BBQ Chicken Fried Rice
Boneless Skinless Chicken Thighs: 1.5 lbs (680g). We choose thighs over breasts because the higher fat content allows for a harder sear without drying out the meat, essential for those caramelized edges.
Day-Old Long Grain White Rice: 4 cups (600g). Fresh rice contains too much moisture; using chilled rice ensures the grains stay separate and “fry” rather than steam.
The Yakiniku Glaze: 1/2 cup (120ml). This thick, amber sauce is a blend of soy sauce, mirin, toasted sesame oil, and garlic, designed to caramelize instantly upon hitting the hot skillet.
Aromatic Base: 2 tbsp (30g) minced garlic and 1 tbsp (15g) grated ginger. These foundational ingredients provide the invisible depth of flavor that carries the entire dish.
Vegetable Medley: 1/2 cup (75g) carrot micro-cubes and 1/2 cup (75g) frozen sweet peas. These are the classic “fried rice” staples that provide sweetness and a necessary crunch.
Toasted White Sesame Seeds: 1 tbsp (9g). These add a nutty finish and a professional visual touch to the final presentation.
Fresh Scallions: 3 large stalks. Thinly sliced on a bias, these provide a sharp, fresh bite to cut through the rich BBQ glaze.
High-Heat Cooking Oil: 3 tbsp (45ml) avocado or canola oil. You need an oil with a high smoke point to achieve the “rising steam” and searing effect without burning.
Tools Required for Culinary Success
To replicate the visual blueprint of this recipe, a 12-inch (30cm) Cast Iron Skillet is your best friend. The heavy metal retains heat better than stainless steel, which is crucial for creating the “yakiniku” char on the chicken.
You will also need a Flat-Edged Metal Spatula. This allows you to scrape the caramelized bits (the “fond”) off the bottom of the pan and incorporate them back into the rice for maximum flavor.
If you enjoy this style of high-heat cooking, you might also love our Skillet Steak Kabobs or even the charred flavors found in our Mexican Street Corn Salad.
Developing the Deep Umami Base
Step 1: The High-Heat Chicken Sear
Pat your chicken thigh chunks bone-dry with paper towels. Season lightly with salt and white pepper. Heat 1.5 tbsp (22ml) of oil in your cast iron skillet over medium-high heat until you see the first wisps of smoke.
Add the chicken in a single layer. Do not crowd the pan. Let the meat sit undisturbed for 3-4 minutes until a deep, dark brown crust forms on the edges. Flip and cook for another 2 minutes until the meat is opaque and the edges look slightly charred.
Step 2: Glazing the Yakiniku Gold
Pour 1/4 cup (60ml) of the Yakiniku sauce directly over the seared chicken. Watch as it bubbles and thickens instantly. Toss the chicken rapidly to coat every piece in the translucent amber glaze.
Once the sauce has reduced into a sticky, glistening coating that clings to the meat, remove the chicken from the pan and set it aside on a plate. Do not wash the skillet; those caramelized drippings are flavor gold.
Step 3: Sautéing the Micro-Cubes
Add the remaining oil to the same skillet. Toss in your finely diced carrots. Sauté for 2-3 minutes until they begin to soften but still retain a slight “snap.”
Stir in the garlic and ginger. Cook for only 30 seconds until fragrant. You want to smell the aromatics without letting the garlic turn bitter or brown.
Step 4: The Rice Foundation and Tempering
Increase the heat to high. Add the chilled rice to the skillet. Use your spatula to break up any clumps. Spread the rice out and let it “toast” for 2 minutes without stirring.
Drizzle 2 tbsp (30ml) of soy sauce and the remaining Yakiniku glaze over the rice. Toss continuously. The rice should take on a beautiful golden-brown, soy-seasoned hue.
Step 5: The Final Integration
Fold the glazed chicken and the green peas back into the rice. Toss everything together for 2 minutes. The peas should turn a bright, vibrant green, and the chicken should be heated through.
Look for the visual cue: the rice should look “fluffy” and distinct, with a slight sheen from the sesame oil, and you should see steam rising vigorously from the skillet.
Expert Tips for the Ultimate Fried Rice Texture
- Rinse Your Rice: If you are cooking rice specifically for this dish, rinse it under cold water until the water runs clear. This removes surface starch and prevents clumping.
- The “Fridge” Trick: For the best results, spread freshly cooked rice on a baking sheet and put it in the freezer for 15 minutes or the fridge for 2 hours before frying.
- Don’t Over-Sauce: It’s tempting to add more glaze, but too much liquid will make the rice soggy. Focus on the coating, not the soaking.
- Wok Hei in a Skillet: Keep the heat high! The “breath of the wok” can be replicated in cast iron by keeping the ingredients moving and the pan smoking hot.
Flavor Pairings and Serving Suggestions
This savory japanese bbq chicken fried rice pairs beautifully with refreshing, tangy sides. Consider serving it alongside a crisp cucumber salad or our Creamy Mexican Corn for a fusion feast.
For those looking for more international inspirations, check out our Smoky Chicken Tinga for a different take on shredded poultry, or explore our 30-Minute Vegetarian Meals for meatless stir-fry alternatives.
Frequently Asked Questions
Absolutely. You can swap the chicken for extra-firm pressed tofu or cauliflower florets. Just ensure you sear them using the same high-heat method for the glaze.
Yes, high-quality brands like Bachan’s work perfectly. Just ensure you simmer it slightly if it’s too thin to achieve that thick, amber glaze.
Use a cast iron skillet and high-heat oil. Pat the chicken dry before cooking and don’t move it for the first 3-4 minutes to allow the Maillard reaction to occur.
Yes. Yakiniku sauce is typically bolder, often containing toasted sesame oil, garlic, and sometimes fruit juice or miso, whereas Teriyaki is a simpler soy-sugar-ginger glaze.
Medium or long-grain white rice (like Jasmine) is best. It should be cooked and chilled for at least 12 hours to ensure the grains remain distinct and fluffy.
The Ultimate Japanese BBQ Chicken Fried Rice Recipe
[Image-Pin]
Japanese BBQ Chicken Fried Rice with Sizzling Yakiniku Glaze
Ingredients
Equipment
Method
- Heat oil in a cast iron skillet over medium-high heat. Add chicken thighs and sear for 4 minutes until charred edges form.
- Pour 1/4 cup Yakiniku sauce over chicken. Toss until glistening and amber, then remove from pan.
- In the same pan, sauté carrots for 2 minutes. Add garlic and ginger, cooking until fragrant.
- Add chilled rice and remaining sauces. Toss on high heat for 3-5 minutes until the rice is soy-seasoned and fluffy.
- Fold in peas and glazed chicken. Garnish with sesame seeds and scallions and serve while steam is rising.
Notes
Ensure the skillet is smoking hot before adding the chicken to get those charred edges.
[Image-Pin-2]
Preserving the Perfection: Storage and Reheating
Leftover fried rice is a gift. Store any remaining japanese bbq chicken fried rice in an airtight container in the refrigerator for up to 3 days. To maintain the texture, avoid the microwave if possible.
Instead, reheat the rice in a hot skillet with a teaspoon of oil and a splash of water. Cover the pan for 60 seconds to let the steam revive the grains, then toss until the chicken is sizzling again.
You can also freeze this dish for up to one month. Thaw it overnight in the fridge before following the skillet reheating method described above.
Join the Skillet Community!
Did those charred Yakiniku edges turn out as glistening as the photos? We want to see your results! Leave a comment below and tell us how your family enjoyed this restaurant-quality meal.
If you loved this recipe, please share it on Pinterest so others can find their new favorite dinner. Don’t forget to sign up for our newsletter for more skillet-based culinary adventures and “forensic” recipe guides!
[Image-Pin-3]