When searching for the ultimate easy chicken dinner ideas, most home cooks are looking for three specific things: minimal cleanup, maximum flavor, and a texture that rivals a high-end bistro. This Garlic Butter Skillet Chicken and Potatoes delivers on all three fronts, offering a visually stunning, one-pan masterpiece that transitions perfectly from the stove to the table.
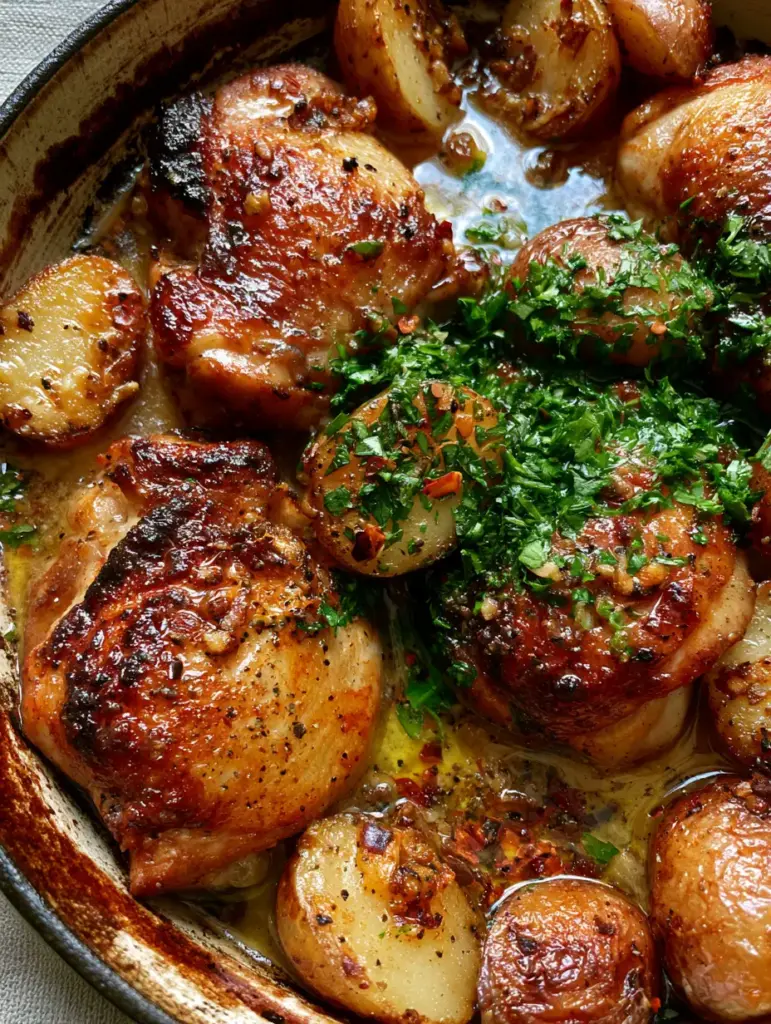
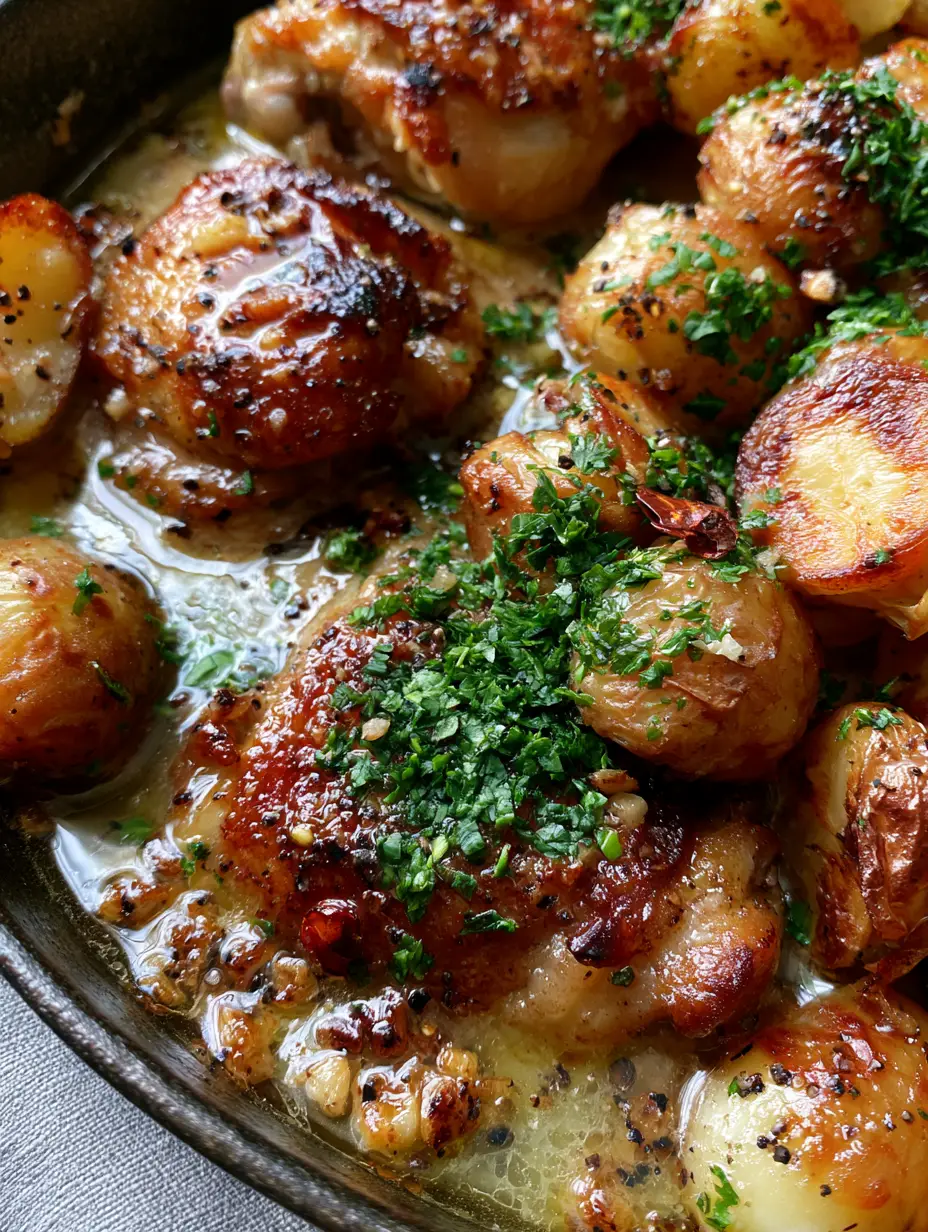
Imagine a rustic cast iron skillet filled with chicken thighs that boast a deeply caramelized, mahogany-brown crust. Nestled alongside them are baby potatoes, roasted until their skins are blistered and their centers are creamy.
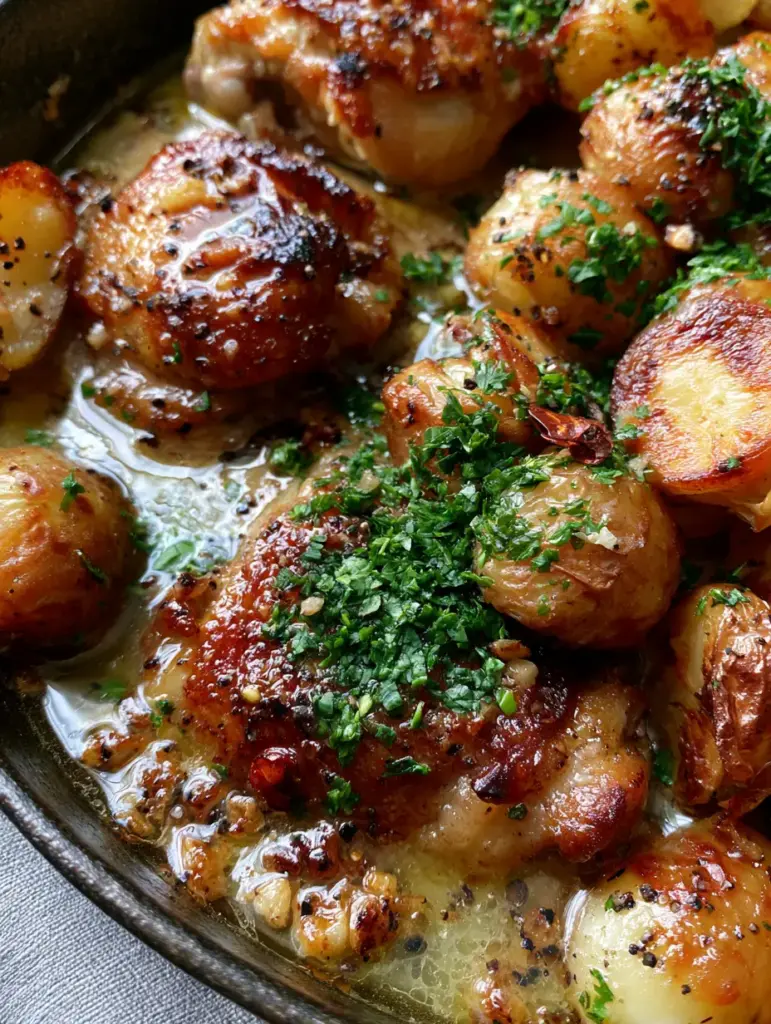
The entire dish is bathed in a shimmering, translucent garlic butter sauce, punctuated by bits of golden-browned minced garlic and the sharp bite of cracked black pepper. A final dusting of fresh parsley and red chili flakes adds a pop of color and a gentle heat that wakes up the palate.
Why This Crispy Skillet Chicken is the Ultimate Weeknight Win
- Visual Texture Mastery: The combination of high-heat searing and butter basting creates chicken skin that is shatteringly crisp while the meat remains succulent.
- One-Pan Efficiency: By using a single cast iron skillet, you build layers of flavor—starting with chicken fat, followed by potato starch, and finishing with aromatic butter.
- Sophisticated Flavor Profile: While these are easy chicken dinner ideas, the use of browned garlic and red pepper flakes provides a depth of flavor usually reserved for complex recipes.
- Perfect Potato Blistering: The baby potatoes absorb the rendered chicken fat, ensuring every bite is seasoned from the inside out.
The Foundation: Ingredients for Success
To achieve the specific macro-shot results seen in our visuals, you need to select your ingredients with a forensic eye for quality. Every element in this skillet serves a structural and flavor-oriented purpose.
The Protein and Produce
4-6 Bone-In, Skin-On Chicken Thighs (approx. 1.5 lbs / 680g): Skin-on thighs are non-negotiable for this recipe. The skin provides the fat necessary to fry the potatoes and creates that “deeply caramelized” visual we are aiming for.
1 lb (450g) Baby Potatoes: These should be halved to expose the flesh. This maximizes the surface area for “blistering” and ensures they cook at the same rate as the chicken.
6-8 Cloves Garlic (minced): We aren’t just using garlic for scent; we are using it as a textural element. Sautéing it until golden-brown creates those “visible bits” in the sauce.
The Flavor Elevators
4 tbsp (56g) Unsalted Butter: The butter creates the “shimmering, translucent” sauce that coats the chicken and potatoes. Using unsalted allows you to control the seasoning precisely.
1 tsp (2g) Dried Red Pepper Flakes: These provide a subtle heat and a vibrant red contrast against the green parsley.
1/4 cup (15g) Fresh Italian Parsley: Chopped finely, this adds the “bright green” garnish that cuts through the richness of the garlic butter.
2 tbsp (30ml) High-Smoke Point Oil: Avocado or grapeseed oil is essential for the initial sear, as butter would burn at the temperatures required for crispy skin.
Kosher Salt and Coarse Cracked Black Pepper: Large grains of black pepper are vital for the “macro shot” aesthetic and provide a pungent floral heat.
Essential Tools for a Restaurant-Quality Sear
To execute these easy chicken dinner ideas properly, your equipment matters as much as your ingredients. The goal is even heat distribution and a natural non-stick surface.
12-inch Cast Iron Skillet: This is the hero of the dish. Its heat retention is what creates the “blistered” potato skins and the “deeply caramelized” chicken edges described in our visual blueprint.
Fish Spatula or Tongs: A thin metal spatula allows you to get under the chicken skin without tearing it, ensuring the crust stays on the meat and not on the pan.
Paper Towels: The “secret” tool. You must pat the chicken skin bone-dry before it hits the pan to achieve a forensic-level crispness.
Mastering the Art of the Golden Sear: Step-by-Step Instructions
Phase 1: Prepping for Crispness
Start by removing your chicken thighs from the refrigerator about 20 minutes before cooking. This takes the chill off and ensures even cooking throughout the meat.
Pat the skin of the chicken thighs with paper towels until they are completely dry. Season both sides generously with kosher salt and a heavy dusting of cracked black pepper. Do not skimp on the pepper; it needs to be visible in the final presentation.
Phase 2: The Initial Sear
Heat 2 tbsp (30ml) of oil in your cast iron skillet over medium-high heat. You will know the pan is ready when the oil begins to shimmer and a tiny wisp of smoke appears.
Place the chicken thighs skin-side down in the skillet. Listen for the aggressive sizzle. Press down lightly with your spatula to ensure full contact. Sear for 7-9 minutes without moving them. You are looking for a deep, mahogany golden-brown color.
Phase 3: Blistering the Potatoes
Flip the chicken and cook for another 2 minutes, then remove the chicken and set it aside on a plate. The chicken will not be fully cooked yet; we are finishing it with the potatoes.
Add the halved baby potatoes to the skillet, cut-side down. They will begin to fry in the rendered chicken fat. Cook for 8-10 minutes, stirring occasionally, until the skins are blistered and the flesh is golden. If you enjoyed this technique, you might also like our classic Chicken Vesuvio for another potato-heavy favorite.
Phase 4: The Garlic Butter Bath
Reduce the heat to medium. Move the potatoes to the edges of the pan and add the 4 tbsp (56g) of butter to the center. Once melted and bubbling, add the minced garlic and red pepper flakes.
Sauté the garlic for about 1-2 minutes. Watch for the visual cue: the garlic should turn a light golden brown, becoming fragrant and nutty. Avoid letting it turn dark brown or black, as it will become bitter.
Phase 5: The Final Assembly
Nestle the chicken thighs back into the skillet among the potatoes. Use a spoon to baste the shimmering garlic butter over the chicken skin. The butter should fill the crevices of the “deeply caramelized” edges.
Transfer the skillet to a preheated oven at 400°F (200°C) for 10-12 minutes to ensure the chicken reaches an internal temperature of 165°F (74°C). Remove and garnish immediately with a “heavy dusting” of fresh chopped parsley.
Expert Tips for Success
- Don’t Overcrowd: If the chicken thighs are touching, they will steam instead of sear. Use a large enough skillet or cook in batches to maintain that “crispy edge” visual.
- The Butter Baseline: If the skillet seems dry before adding the butter, add an extra tablespoon. The “shimmering, translucent” look requires enough fat to coat every potato half.
- Cold Butter vs. Room Temp: Use cold butter for the sauce; it melts more slowly and creates a thicker, more emulsified coating for the chicken.
- Internal Temperature: Use a meat thermometer. Thighs are forgiving, but they are most succulent when pulled at exactly 165°F (74°C).
Storage, Reheating, and Freezing
While easy chicken dinner ideas are best served fresh for the texture, this dish holds up well. Store leftovers in an airtight container for up to 3 days in the refrigerator.
To reheat and preserve the crispy skin, avoid the microwave. Place the chicken and potatoes back into a skillet over medium heat with a splash of water or broth, covering the pan for 3-4 minutes until warmed through. Then, remove the lid for 2 minutes to recrisp the bottom.
Freezing is not recommended for this specific dish, as the potatoes will lose their “blistered” texture and become mealy upon thawing.
What to Serve With This Skillet Dinner
Since this dish is rich in garlic and butter, you want sides that provide a bright, acidic contrast. A crisp chickpea spinach salad is an excellent choice to cut through the fat.
If you’re looking for more easy chicken dinner ideas to add to your rotation, consider our bruschetta chicken casserole for a Mediterranean twist or these buffalo chicken bowls for a spicy weeknight alternative.
For those who love a bit of sweetness, the contrast of this savory garlic dish pairs surprisingly well with a follow-up of peanut butter banana muffins for dessert.
Frequently Asked Questions
While possible, chicken breasts lack the skin and fat necessary to properly blister the potatoes and achieve the deep caramelization shown in the visuals. If using breasts, reduce cook time to avoid drying them out.
While any heavy-bottomed oven-safe skillet works, cast iron provides the most even heat distribution for that specific deeply caramelized, rustic look.
The key is moisture removal. Pat the chicken skin with paper towels until it is completely dry and don’t move the chicken once it hits the hot cast iron skillet.
Baby potatoes (or new potatoes) are ideal because their thin skins blister beautifully and their high starch content allows for a creamy interior that contrasts the crispy chicken.
Ensure you reduce the heat before adding the butter. If the pan is too hot, the milk solids in the butter will separate. Adding a teaspoon of water or broth can help re-emulsify the sauce.
The Ultimate One-Pan Garlic Butter Chicken
Easy Chicken Dinner Ideas: Crispy Garlic Butter Skillet Chicken and Potatoes
Ingredients
Equipment
Method
- Pat chicken skin bone-dry with paper towels and season generously with salt and cracked black pepper.
- Heat oil in cast iron skillet over medium-high heat. Sear chicken skin-side down for 7-9 minutes until deeply caramelized and crispy. Flip for 2 minutes, then remove and set aside.
- Add halved potatoes to the skillet cut-side down. Fry in chicken fat for 8-10 minutes until blistered and golden.
- Reduce heat to medium. Melt butter in the center of the pan, add minced garlic and pepper flakes, and sauté until garlic is golden brown.
- Return chicken to pan. Bake at 400°F (200°C) for 10-12 minutes until done. Garnish with fresh parsley.
Notes
Use a meat thermometer to pull chicken at exactly 165°F.
Closing & Call to Action
This recipe proves that easy chicken dinner ideas don’t have to be boring or basic. By focusing on the visual cues of a perfect sear and the aromatic power of browned garlic, you can create a meal that looks like a professional food photograph and tastes even better.
Did your potatoes get that perfect blister? Did the garlic butter hit the spot? Let us know in the comments below! If you loved this recipe, please share it on Pinterest and tag us in your creations.