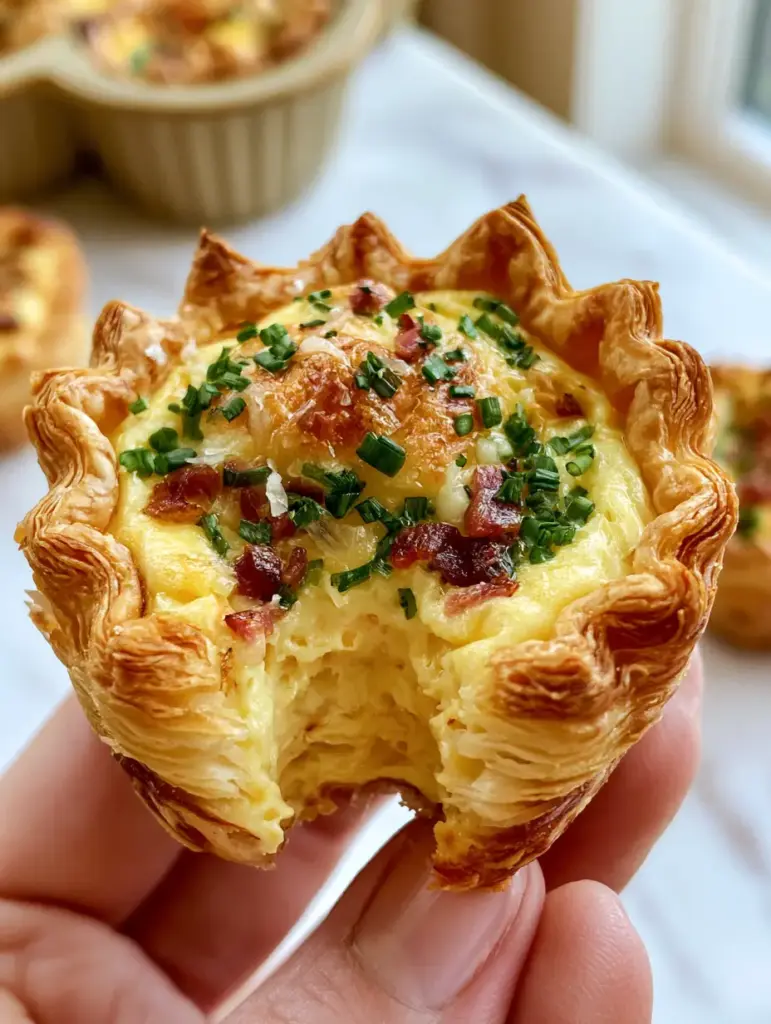
Imagine waking up to the aroma of sizzling bacon and buttery pastry wafting through your home. These Mini Quiches are the ultimate brunch showstopper, featuring a shatteringly crisp puff pastry crust and a silken, domed custard filling. Whether you are hosting a festive gathering or looking for a sophisticated meal prep option, these bite-sized delights offer a gourmet experience in every mouthful.
The beauty of the Mini Quiches lies in the contrast of textures. You get the crunch of the golden-brown fluted edges, the richness of melted sharp white cheddar, and the fresh pop of vibrant green chives. One look at the airy, light interior revealed after a single bite, and you will understand why this recipe is a staple in high-end food blog aesthetics.
In this guide, we will dive deep into the culinary science of the perfect custard ratio and the forensic details required to achieve that iconic domed look. From selecting the right smoked bacon to mastering the art of the puff pastry base, every step is designed for success. Let’s transform your kitchen into a professional pâtisserie with this foolproof method.
Why You Will Crave These Handheld Savory Delights
- Shatteringly Flaky Crust: By using a puff pastry base instead of standard pie dough, we achieve hundreds of buttery layers that provide a distinct “crunch” in every bite.
- Perfectly Domed Custard: Our specific egg-to-cream ratio ensures a filling that rises beautifully in the oven and maintains a light, airy texture without collapsing.
- High-Contrast Flavors: The smokiness of the bacon bits pairs perfectly with the bite of sharp white cheddar and the oniony brightness of fresh chives.
- Professional Aesthetic: The fluted round shape and vibrant green garnish make these look like they came straight from a luxury bakery window.
The Scientific Anatomy of Our Gourmet Ingredients
Selecting the right components is the first step in culinary excellence. Each ingredient in these Mini Quiches serves a specific structural and flavor-focused purpose.
Store-Bought or Homemade Puff Pastry: You will need 2 sheets (approx. 17.3 oz / 490g) of high-quality puff pastry. This provides the laminated fat layers necessary for that golden-brown, multi-layered visual described in our blueprint.
Large Eggs: Use 4 large eggs (approx. 200g) to act as the primary structural binder. Eggs provide the protein network that traps air, allowing the quiche to dome slightly as it bakes.
Heavy Cream (Double Cream): 1 cup (240ml) of heavy cream is essential for a luxurious mouthfeel. The high fat content prevents the eggs from becoming rubbery, ensuring a “fluffy, pale yellow” interior.
Whole Milk: 1/2 cup (120ml) of whole milk lightens the custard slightly. This balance between cream and milk creates a filling that is rich yet airy, rather than overly dense.
Sharp White Cheddar Cheese: 1 cup (115g) of freshly shredded white cheddar adds a complex, tangy saltiness. We use white cheddar specifically to maintain the “pale yellow” aesthetic of the custard without turning it orange.
Smoked Bacon: 6 strips (approx. 150g) of thick-cut smoked bacon provide the “crispy smoked bacon bits.” Frying them until the fat renders out ensures they stay crunchy even inside the moist custard.
Fresh Chives: 1/4 cup (10g) of finely chopped fresh chives adds the “vibrant green” color contrast. Chives offer a delicate allium flavor that doesn’t overwhelm the palate like raw onions might.
Cracked Black Pepper and Sea Salt: A pinch of each is vital for seasoning. The black pepper adds those visible dark flecks mentioned in the visual recipe blueprint.
Foundational Fat (Unsalted Butter): 1 tbsp (14g) of melted butter is used to grease the muffin tin. This ensures the puff pastry releases cleanly, preserving the fluted edges.
Essential Tools for the Perfect Fluted Shape
To achieve the “round fluted shape” seen in our high-end photography, specific equipment is required. A standard 12-cup muffin tin is the foundation, but a 3-inch (7.6cm) fluted round cookie cutter is the secret to those professional edges.
You will also need a sharp chef’s knife for “finely chopping” the chives and a heavy-bottomed skillet for rendering the bacon. A wire whisk and a glass measuring cup with a spout will make pouring the custard into the small pastry shells much cleaner, preventing drips that can burn on the tin.

Step-by-Step Instructions to Culinary Perfection
Preparing the Flaky Puff Pastry Base
Start by thawing your puff pastry in the refrigerator for at least 2 hours. Once cold but pliable, roll it out on a lightly floured surface to about 1/8-inch (3mm) thickness. Use your fluted cutter to stamp out circles, ensuring you get as many as possible from each sheet.
Press the pastry circles into a well-greased muffin tin. Make sure the pastry reaches up the sides to create a “well” for the custard. Place the tin back in the freezer for 10 minutes; this “shocks” the butter, which is the secret to achieving those “incredible flaky layers” during the bake.
Rendering the Crispy Smoked Bacon Bits
While the pastry chills, dice your smoked bacon into tiny 1/4-inch (6mm) pieces. Place them in a cold skillet over medium heat. By starting with a cold pan, you render more fat, resulting in a superior “crispy” texture.
Fry the bacon until it reaches a deep mahogany brown. Use a slotted spoon to transfer the bits to a paper-towel-lined plate. This step is critical; if you add oily bacon to the quiche, the grease will break the custard emulsion.
Whisking the Fluffy Egg Custard
In a large bowl, whisk together the eggs, heavy cream, and whole milk. Do not over-beat; you want to incorporate the ingredients until smooth without creating excessive foam. Season with sea salt and a generous “pinch of cracked black pepper.”
Stir in half of the finely chopped chives and half of the shredded white cheddar. Saving the rest for the top ensures the “vibrant green” and “melted cheese” visuals are front and center in your final dish.
The Assembly and Precision Bake
Preheat your oven to 400°F (200°C). Divide the crispy bacon bits evenly among the pastry shells. Pour the custard mixture over the bacon, filling each shell about 3/4 of the way full. This allows room for the “slightly domed” rise.
Top each quiche with the remaining white cheddar and chives. Bake for 20-25 minutes. Look for the “Visual & Sensory Cues”: the pastry should be a deep golden-brown, and the centers should be set but have a slight wobble when the pan is nudged. The tops will be puffed and domed.
Expert Tips for Success
- Keep the Pastry Cold: If the puff pastry becomes too warm, the layers will fuse together, and you will lose that “light, airy interior texture.” Always chill before baking.
- Avoid Overfilling: Filling the shells to the very brim will cause the custard to spill over and stick to the tin, ruining the fluted shape.
- Freshly Grated Cheese: Avoid pre-shredded cheese in bags. These are coated in potato starch which can make the “melted white cheddar” look grainy instead of smooth.
- The Resting Period: Let the Mini Quiches sit in the tin for 5 minutes after baking. This allows the steam to release slightly, making them easier to pop out without breaking the delicate crust.
Storage, Reheating, and Freezing Advice
These Mini Quiches are best enjoyed fresh from the oven when the pastry is at its maximum crispness. However, you can store leftovers in an airtight container in the refrigerator for up to 3 days. To maintain the texture, avoid the microwave, which can make the puff pastry chewy.
For reheating, place the quiches on a baking sheet in a 350°F (175°C) oven for 8-10 minutes. If you wish to freeze them, bake them fully, let them cool completely, and freeze in a single layer. They can be reheated directly from frozen—just add 5 minutes to the reheating time.
What to Serve With Mini Quiches
To create a balanced brunch spread, pair these rich quiches with lighter options. A refreshing viral cucumber salad provides a crisp acidity that cuts through the buttery pastry and cream. If you are serving these as part of a larger breakfast, consider adding some hearty potato side dishes.
For those who love a mix of sweet and savory, these quiches are a dream alongside brown sugar chocolate chip cookies. If you’re looking for more snackable inspiration, explore our collection of salty snack recipes to round out your party menu. Finally, maintaining a balance is key, so don’t forget to include some healthy foods like a fresh fruit platter.
Frequently Asked Questions
Absolutely. You can assemble them and keep them in the fridge for 4 hours before baking, or bake them fully and reheat in the oven to restore the pastry’s crispness.
Yes, but you will lose the ‘flaky buttery layers’ described in this recipe. Pie crust will be more short and crumbly rather than light and airy.
Baking at a high temperature (400°F/200°C) and ensuring your bacon is fully rendered and drained will prevent excess moisture from soaking into the bottom crust.
The most common reason is that the pastry became too warm before baking. The butter must be cold to create steam and separate the layers. Always chill your filled quiches for 10 minutes before putting them in the oven.
The Ultimate Mini Quiches Recipe Card

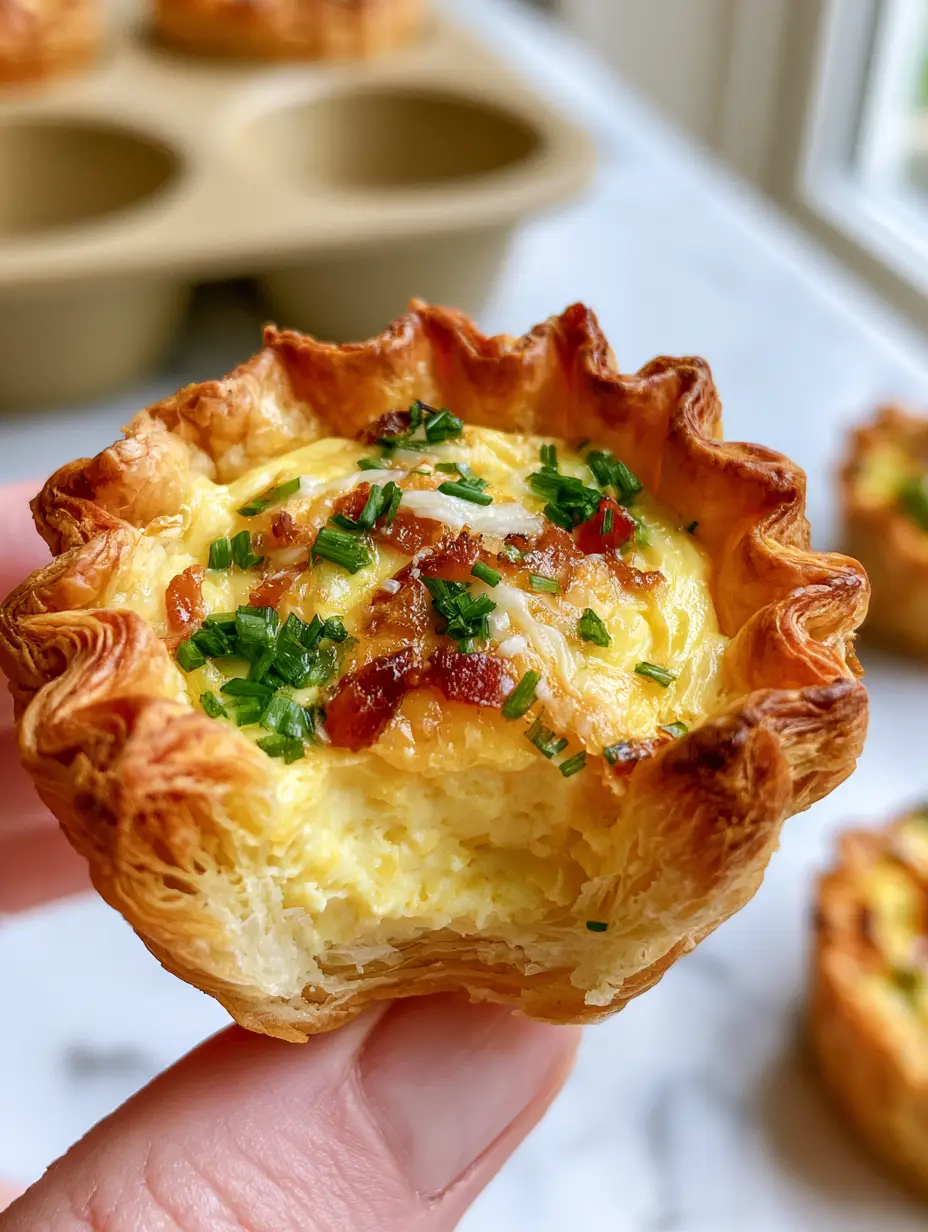
Mini Quiches with Flaky Puff Pastry and Crispy Smoked Bacon
Ingredients
Equipment
Method
- Roll out chilled puff pastry and cut 12 rounds using a 3-inch fluted cutter. Press into a buttered muffin tin and freeze for 10 minutes.
- Dice bacon and fry in a cold skillet over medium heat until crispy. Drain on paper towels.
- Whisk eggs, heavy cream, milk, salt, and pepper until smooth. Stir in half the chives and half the cheese.
- Divide bacon among pastry shells, pour in custard, and top with remaining cheese and chives.
- Bake at 400°F (200°C) for 20-25 minutes until pastry is golden-brown and filling is domed and set.
Notes
Use a glass measuring cup to pour the custard for a mess-free assembly.
Closing & Call to Action
Mastering these Mini Quiches is a surefire way to elevate your culinary repertoire. The combination of the “flaky buttery layers” and the “fluffy egg custard filling” creates a sensory experience that is truly unmatched. We hope you enjoy the process of baking these as much as the process of eating them!
If you tried this recipe, please leave a comment below and tell us how your custard domed! Don’t forget to share your creations and follow us on Pinterest for more gourmet inspiration. Happy baking!