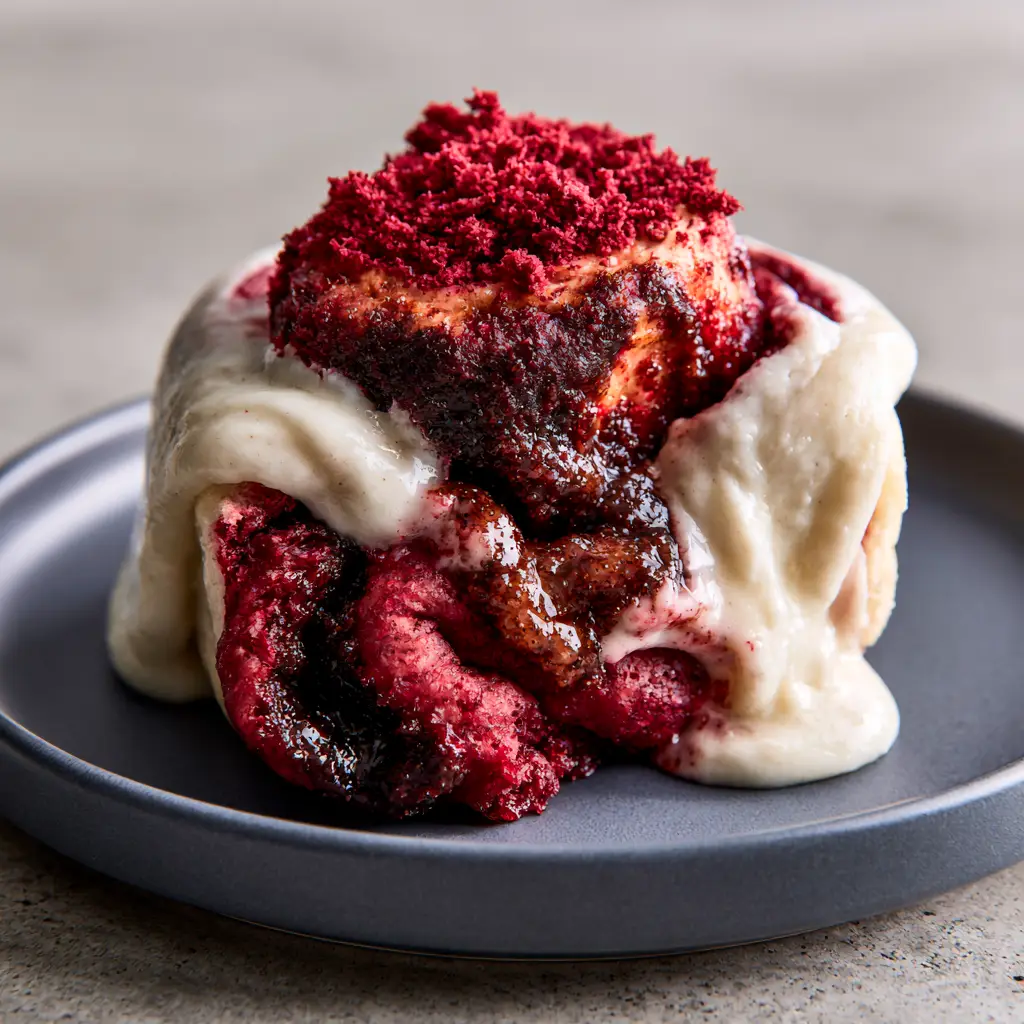
Red velvet cinnamon rolls are the ultimate show-stopping breakfast that combines the soul-warming comfort of a classic cinnamon roll with the decadent, cocoa-infused flair of a red velvet cake. From the very first glance at these deep crimson, pillowy swirls, your guests will be captivated by the vibrant color and the heavenly scent of warm yeast and melted chocolate. Whether you are hosting a holiday brunch or simply want to elevate your weekend morning routine, these rolls deliver a bakery-quality experience right in your own kitchen.
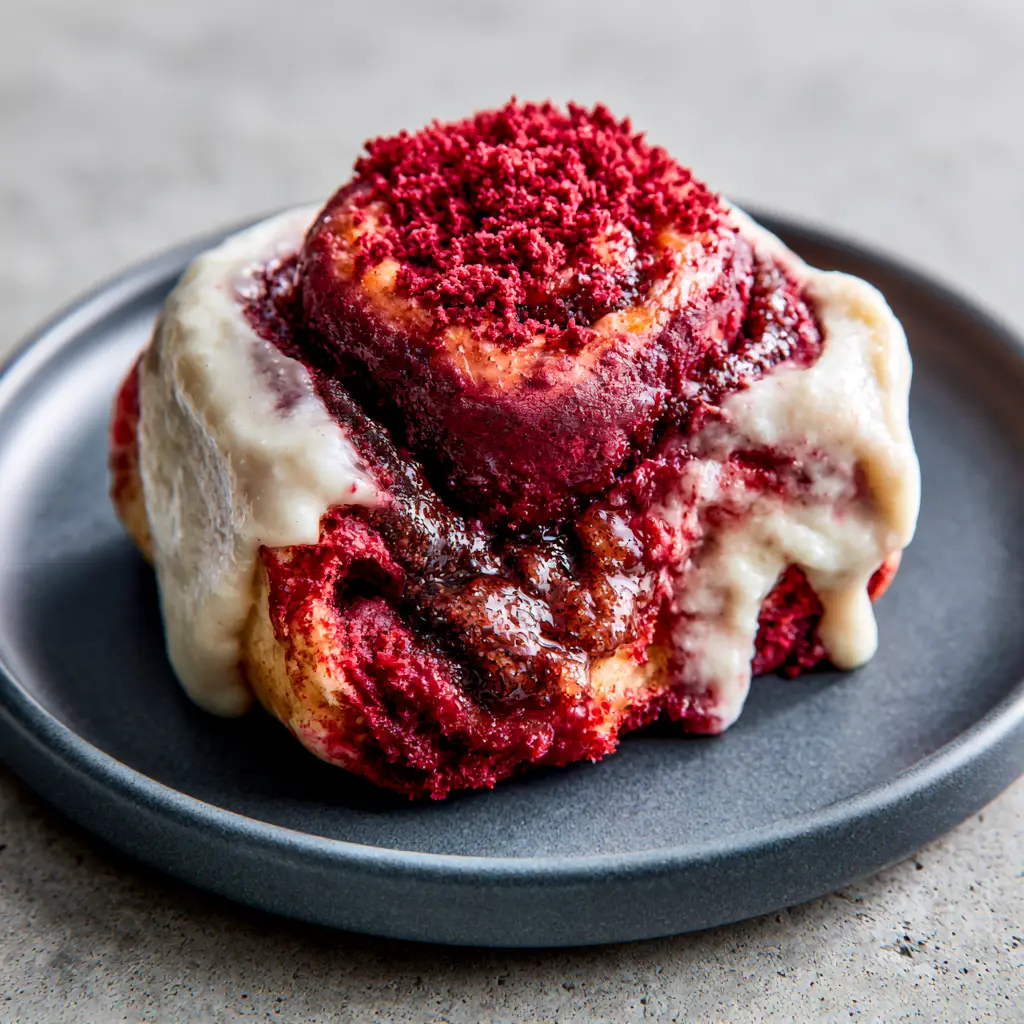
Imagine pulling apart a warm, steaming layer of red velvet dough to reveal a glistening, melted brown sugar and cocoa filling. Each bite is perfectly balanced by a thick, velvety white cream cheese glaze that cascades down the sides, topped with a delicate dusting of fine red velvet cake crumbs for that professional finish. If you love decadent treats, you might also want to try my Red Velvet Banana Pudding for your next gathering.
Why You Will Fall in Love With These Crimson Rolls
- The Perfect Texture: A soft, pillowy yeast dough that stays tender for days thanks to the addition of buttermilk.
- Visually Stunning: The contrast between the deep red dough and the snow-white glaze makes these red velvet cinnamon rolls a Pinterest-worthy masterpiece.
- Rich Flavor Profile: A subtle hint of cocoa in the dough perfectly complements the bold cinnamon and brown sugar filling.
- Indulgent Topping: A rich, glossy cream cheese frosting that provides the signature tang essential to any red velvet dessert.
The Essential Components for Red Velvet Cinnamon Rolls
Creating the perfect red velvet cinnamon rolls requires a balance of pantry staples and specific ingredients that provide that iconic flavor and color. Each ingredient serves a scientific purpose in the culinary structure of the roll.
Whole Milk (240ml): Provides the fat and liquid needed to hydrate the yeast and create a rich, tender crumb.
Active Dry Yeast: The leavening agent that ensures your rolls rise into airy, cloud-like spirals.
Granulated Sugar (100g): Feeds the yeast and provides a delicate sweetness to the dough itself.
Unsalted Butter (115g): Melted and cooled, this adds richness and contributes to the “melt-in-your-mouth” quality.
Buttermilk (120ml): The secret to authentic red velvet flavor; the acidity reacts with the cocoa and keeps the dough incredibly soft.
Red Food Coloring: Use a high-quality gel or liquid to achieve that deep, vibrant crimson hue specified in the visual blueprint.
All-Purpose Flour (560g – 600g): The structural foundation. We use just enough to keep the dough workable but still slightly tacky.
Unsweetened Cocoa Powder (15g): Provides the signature light chocolate undertone that defines red velvet.
Dark Brown Sugar (200g): For the filling; its high molasses content creates a syrupy, glistening swirl when baked.
Ground Cinnamon (2 tbsp): The warm, aromatic spice that makes these a true cinnamon roll.
Cream Cheese (225g): Full-fat brick cream cheese is essential for a thick, stable glaze that doesn’t just disappear into the bread.
Red Velvet Cake Crumbs: A handful of dried, crumbled red velvet cake provides the final textural contrast on top.
The Science of Creating the Perfect Yeast Dough
Mastering red velvet cinnamon rolls begins with the dough. Unlike a standard white dough, the addition of cocoa powder can slightly change how the gluten develops. By using the “tangzhong” method or simply ensuring high hydration, we keep the rolls fluffy.
If you enjoy working with yeast and dough, you might also find my Cinnamon Roll Casserole a great alternative for busy mornings when you want those same flavors with less effort. However, for the true artisan experience, following the steps below is key.
Step 1: Blooming the Yeast and Mixing the Crimson Base
Begin by warming your 1 cup (240ml) of whole milk to approximately 110°F (43°C). Do not overheat the milk, as temperatures above 120°F (49°C) will kill the yeast. Stir in a tablespoon of sugar and the yeast, letting it sit for 5-10 minutes until it becomes frothy and bubbly.
In a large mixing bowl, whisk together your melted butter, buttermilk, remaining sugar, and the red food coloring. The mixture should look like a bright, vibrant liquid. Slowly whisk in the bloomed yeast mixture until fully combined.
Step 2: Incorporating Dry Ingredients and Kneading
Sift together your flour, cocoa powder, and a pinch of salt. Gradually add the dry ingredients to the red liquid. If using a stand mixer, use the dough hook on low speed. Visual Cue: You are looking for a dough that clears the sides of the bowl but remains slightly sticky to the touch.
Knead the dough for 5-7 minutes. The dough should become elastic and smooth, with a deep, uniform red color. Place it in a lightly oiled bowl, cover with a damp cloth, and let it rise in a warm, draft-free spot for 60-90 minutes, or until doubled in size.
Step 3: Rolling, Filling, and the Cocoa Swirl
Once the dough has risen, punch it down to release excess air. Turn it out onto a lightly floured surface and roll it into a large rectangle, approximately 12×18 inches (30x45cm). Spread softened butter across the entire surface, leaving a small margin at the edges.
Mix your brown sugar, cinnamon, and an extra tablespoon of cocoa powder. Sprinkle this generously over the buttered dough. Culinary Secret: Press the sugar mixture lightly into the dough with your hands to ensure it sticks and creates that glistening, melted filling seen in the blueprint.
Roll the dough tightly into a log and cut into 12 even rolls using unflavored dental floss or a very sharp serrated knife. Place the rolls in a greased baking pan and let them rise for a second time (about 30-45 minutes) until they are touching and look “puffy.”
Step 4: Baking to Pillowy Perfection
Preheat your oven to 350°F (175°C). Bake the red velvet cinnamon rolls for 20-25 minutes. You want the edges to be set and the centers to be soft. Be careful not to overbake, as you want to preserve the soft, pillowy layers. If the tops begin to brown too much, you can tent them with foil to protect that crimson color.
How to Make the Signature Velvet Cream Cheese Glaze
While the rolls are cooling slightly, prepare the glaze. Beat together the softened cream cheese, butter, powdered sugar, and a splash of vanilla until rich, glossy, and smooth. If the glaze is too thick, add milk one teaspoon at a time until it reaches a cascading consistency.
For those who love a hearty breakfast spread, these rolls pair beautifully with savory options like my Paula Deen Breakfast Casserole. The contrast between the sweet red velvet and the salty breakfast meats is unmatched.
Expert Tips for Bakery-Style Results
- Temperature Control: Ensure your eggs and buttermilk are at room temperature. This prevents the melted butter from curdling in the dough and ensures an even rise.
- The Floss Trick: Use dental floss to cut your rolls. It prevents squashing the delicate layers of dough and keeps the cocoa powder swirl perfectly defined.
- Don’t Skimp on the Color: Use “Red No-Taste” food coloring if you are sensitive to the bitterness that some red dyes can carry.
- Glaze while Warm: Apply half of the glaze while the rolls are still warm so it seeps into the spirals, and the other half once they have cooled for that thick, white finish.
Storage, Reheating, and Freezing
Storage: Keep these red velvet cinnamon rolls in an airtight container at room temperature for up to 2 days, or in the refrigerator for up to 5 days.
Reheating: For that “just-baked” feel, microwave a single roll for 15-20 seconds. This softens the dough and makes the glaze melty again.
Freezing: You can freeze the unbaked rolls after the first rise. When ready to bake, let them thaw and rise in the fridge overnight before following the standard baking instructions. Alternatively, freeze baked rolls (without glaze) for up to 3 months.
What to Serve With Red Velvet Cinnamon Rolls
These rolls are quite rich, so they pair best with items that balance their sweetness. A hot cup of black coffee or a glass of cold milk is standard. If you are hosting a full brunch, consider adding some protein to the table. A Shortbread Cookies Recipe tray also makes a lovely addition to a dessert-focused brunch table.
Frequently Asked Questions
While the vibrant crimson color is a hallmark of the recipe, you can use beet powder for a natural alternative, though the color may be slightly more earthy and less bright than traditional red velvet.
Yes! After shaping the rolls and placing them in the pan, cover them tightly with plastic wrap and refrigerate. The next morning, let them sit at room temperature for 1 hour to finish their second rise before baking.
Use full-fat brick cream cheese rather than spreadable tubs. Ensure the cream cheese is softened but not melted, and add powdered sugar gradually until you reach your desired thickness.
Red velvet is a unique blend of mild cocoa, tangy buttermilk, and vinegar. In these cinnamon rolls, the buttermilk provides the characteristic tang and ensures a very soft crumb.
The most common reasons are yeast that has expired or using milk that was too hot (over 120°F), which kills the yeast. Ensure your liquid is warm but comfortable to the touch (105°F-110°F).
The Ultimate Red Velvet Cinnamon Roll Recipe
Red Velvet Cinnamon Rolls with Thick Cream Cheese Glaze
Ingredients
Equipment
Method
- Combine warm milk, 1 tbsp sugar, and yeast. Let sit for 10 minutes until frothy.
- Mix butter, buttermilk, remaining sugar, and red color. Add flour and cocoa. Knead for 7 minutes until smooth and elastic.
- Place in an oiled bowl, cover, and let rise for 90 minutes in a warm place until doubled.
- Roll dough into a rectangle. Spread with butter and sprinkle cinnamon-cocoa-sugar mix. Roll into a log and cut into 12 pieces.
- Place rolls in a pan and let rise for 45 minutes.
- Bake at 350°F (175°C) for 20-25 minutes until set.
- Whisk cream cheese glaze ingredients and pour over warm rolls. Sprinkle with cake crumbs.
Notes
Cut the rolls with dental floss for the cleanest layers.

Save, Share, and Rate!
If you enjoyed these red velvet cinnamon rolls, please save this recipe to your favorite Pinterest board! You can follow toastpantry for more decadent breakfast inspiration. Did yours turn out perfectly crimson? Share a photo in the comments below or tag us on social media. Don’t forget to leave a 5-star rating in the recipe card above—it helps other home cooks find this delicious treat!