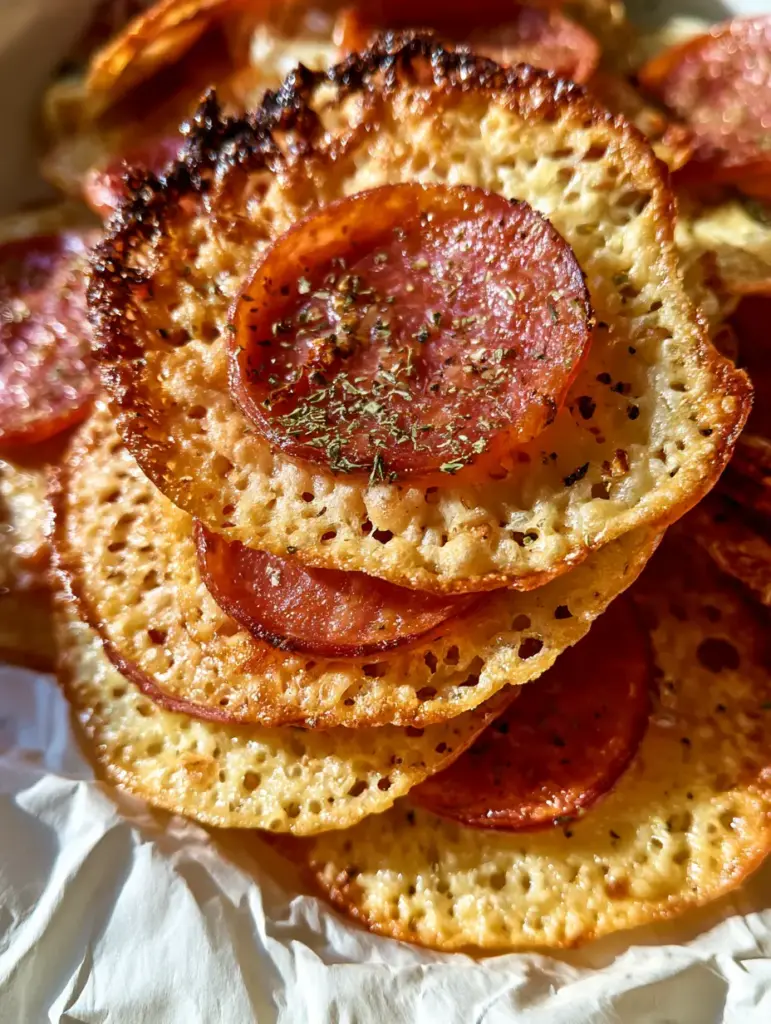
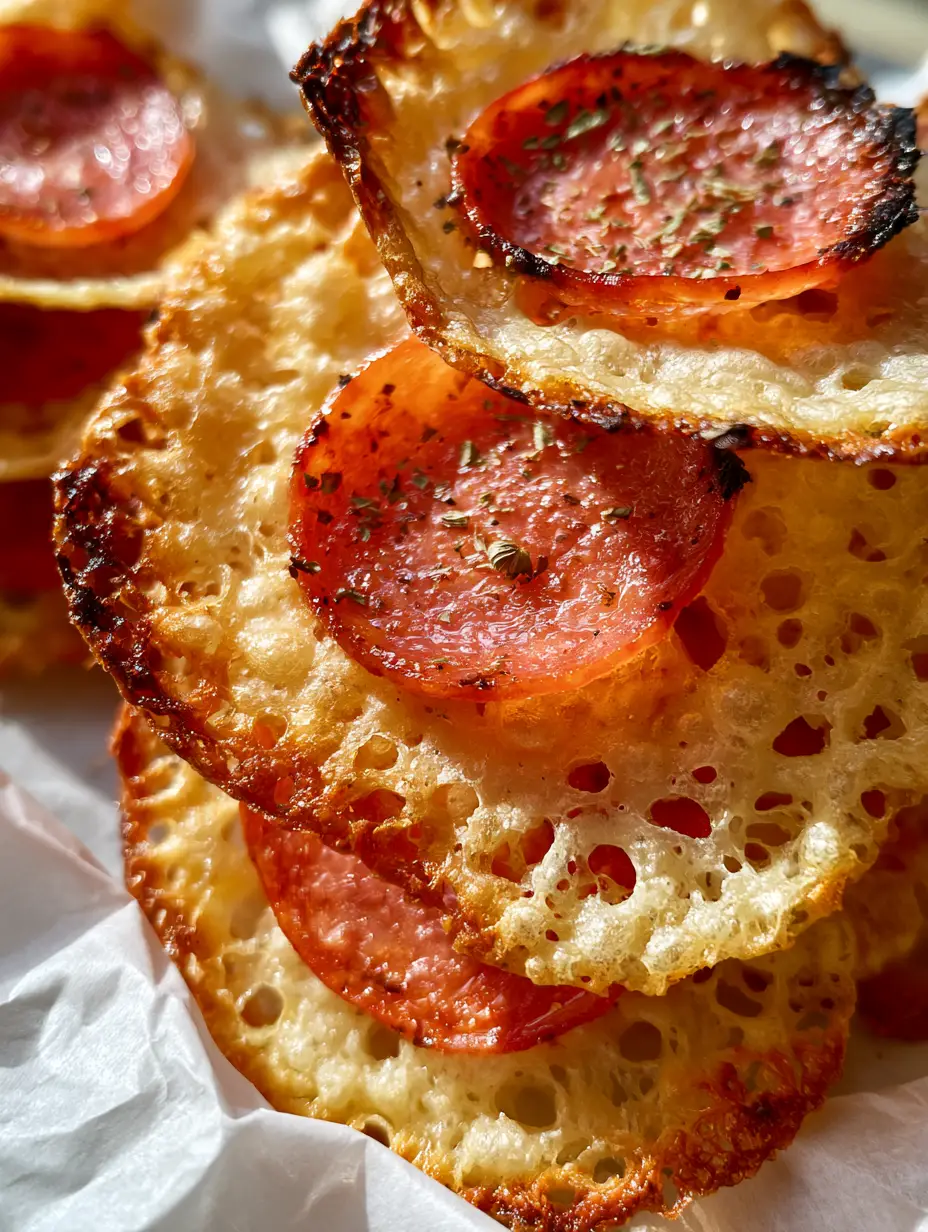
Pepperoni Cheese Crisps are the viral, low-carb solution to your most intense pizza cravings. If you are searching for a snack that delivers a satisfying crunch without the heavy carbs of a traditional crust, these Pepperoni Cheese Crisps are about to become your new kitchen staple. With a lacy, toasted parmesan base and a perfectly charred pepperoni center, they embody everything we love about the crispy edges of a deep-dish pizza.
When you bite into these Pepperoni Cheese Crisps, the first thing you notice is the delicate, perforated texture of the cheese. It is light, airy, and incredibly savory. The natural oils from the pepperoni glisten under the light, providing a rich mouthfeel that balances the sharp saltiness of the parmesan. This recipe is designed for the modern home cook who values both visual aesthetics and bold, culinary simplicity.
Whether you are following a strict ketogenic lifestyle or just looking for a high-protein appetizer to serve at your next gathering, these Pepperoni Cheese Crisps hit every mark. They are visually stunning, featuring curled pepperoni rims and golden-brown bubbly edges that look like they came straight from a professional bistro. Let’s dive into why this 2-ingredient wonder is taking over Pinterest feeds everywhere.
Why You Will Obsess Over These Lacy Pizza Crisps
- The Perfect Snap: The toasted parmesan base creates a “lacy” disc that shatters satisfyingly with every bite.
- Charred Umami Flavor: Thinly sliced pepperoni rounds develop curled edges and dark-gold charred peaks in the oven.
- Zero-Effort Prep: With only two main ingredients and a 10-minute bake time, this is the definition of a low-maintenance snack.
- Visual Masterpiece: The contrast between the vibrant red meat, the golden cheese, and the green flecks of dried oregano is a food photographer’s dream.
- High Protein, Low Carb: Naturally gluten-free and keto-friendly, making them perfect for your Whole30 transition or daily snack rotation.
The Anatomy of a Perfect Pepperoni Cheese Crisp
To achieve that specific Pepperoni Cheese Crisps texture you see in the photos, the quality of your ingredients matters. You aren’t just melting cheese; you are engineering a structural masterpiece of fats and proteins.
Freshly Shredded Parmesan Cheese: You need 1.5 cups (150g) of high-quality parmesan. Avoid the powdered stuff in a green shaker bottle! You want the shredded variety that will melt and then lace together into a perforated disc. This provides the salty, nutty foundation for the Pepperoni Cheese Crisps.
Thinly Sliced Pepperoni: You will need 24 rounds of thin pepperoni. The thickness is key; if they are too thick, they won’t curl at the rims. If they are too thin, they might burn before the cheese is toasted. Look for a traditional deli-style pepperoni that releases those beautiful, glistening natural oils during the baking process.
Aromatic Garnishes: While the base recipe is just two ingredients, we elevate the Pepperoni Cheese Crisps with a dusting of 0.5 tsp (1g) dried oregano flakes and a few cracks of fresh black pepper. This adds that “pizza parlor” aroma that makes these irresistible.
How to Make The Crispiest Pepperoni Cheese Crisps
Phase 1: Prepping the Baking Surface
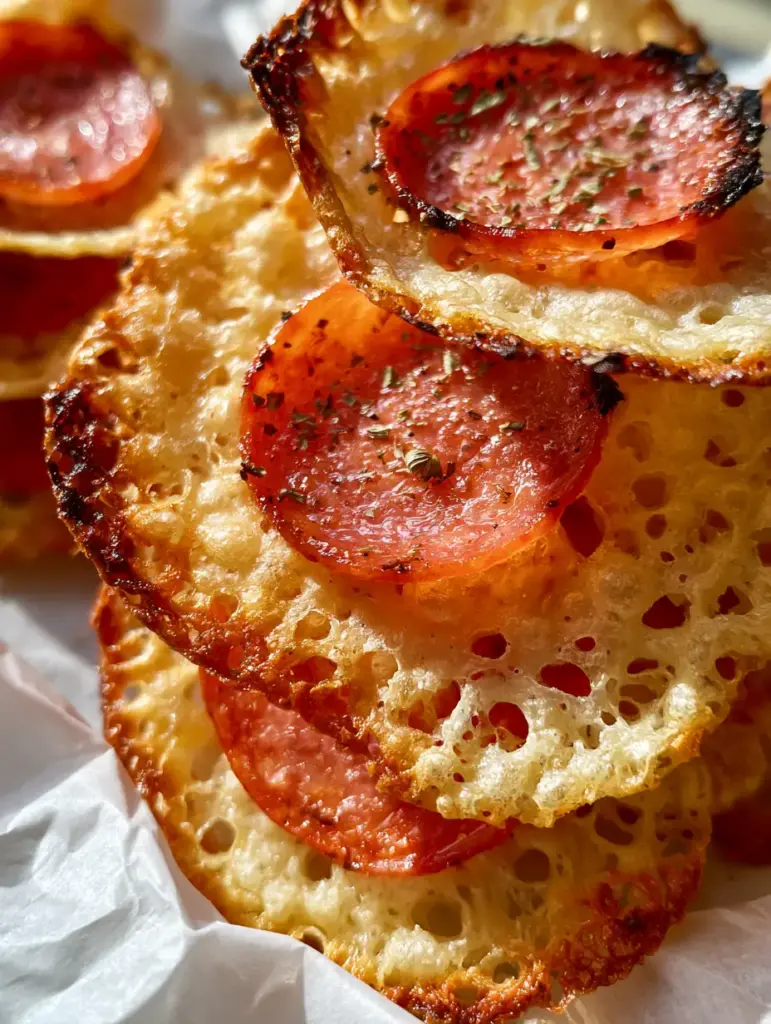
Preheat your oven to 400°F (200°C). The high heat is essential for the “flash-crisping” effect. Line a large rimmed baking sheet with a piece of crumpled white parchment paper. Why crumpled? The slight ridges in the paper allow for better airflow under the cheese, helping the Pepperoni Cheese Crisps achieve that signature lacy, bubbly golden-brown cheese texture.
Phase 2: The Art of the Cheese Mound
Measure out about 1 tablespoon (around 6g-8g) of shredded parmesan for each crisp. Space them at least 2 inches (5cm) apart on the parchment paper. Use your fingers to flatten the mounds slightly into a circle. You want them to be thin enough to see through—this is how you get the perforated, lacy look characteristic of elite Pepperoni Cheese Crisps.
Phase 3: The Pepperoni Placement
Take one pepperoni round and press it firmly into the center of each cheese mound. As the cheese melts, it will grab onto the edges of the meat. If you like a little extra kick, similar to the flavors in pizza rustica, you can add a tiny pinch of red pepper flakes here as well.
Phase 4: The Transformation (Baking)
Slide the tray into the center rack of the oven. Bake for 8 to 10 minutes. Watch for the Visual & Sensory Cues: The cheese should be bubbling vigorously, and the edges will turn a dark gold. You are looking for the pepperoni edges to start curling upward, creating little “cups” that hold the rendered oils. The smell should be intensely savory—like the best toasted crust you’ve ever had.
Phase 5: The Cooling Window
This is the most important step for Pepperoni Cheese Crisps success. When you remove the tray, the crisps will be soft and pliable. Do not touch them! Let them rest on the tray for at least 3-5 minutes. As they cool, the cheese hardens into a rigid, crunchy disc. Once firm, move them to a wire rack to finish cooling so they don’t become greasy on the bottom.
Expert Tips for Success
- Blot the Grease: If your pepperoni is particularly oily, you can lightly dab the tops of the Pepperoni Cheese Crisps with a paper towel immediately after they come out of the oven.
- Uniformity Matters: Try to keep your cheese mounds the same size so they all finish baking at the exact same time.
- Spice it Up: Before baking, sprinkle a little garlic powder over the cheese for a “garlic bread” inspired flavor profile.
- Avoid Silpat: While silicone mats are great, parchment paper (especially crumpled) yields a much crispier result for these specific Pepperoni Cheese Crisps.
Storage, Reheating & Freezing
Storage: Keep your leftover Pepperoni Cheese Crisps in an airtight container at room temperature for up to 24 hours, or in the fridge for up to 5 days. Note that they may lose some crunch in the fridge.
Reheating: To restore that “fresh from the oven” snap, pop them back into a 350°F (175°C) oven or an air fryer for 2-3 minutes. This is much better than the microwave, which will make them rubbery.
Freezing: You can freeze these! Place them in a single layer on a tray to freeze solid, then transfer to a freezer-safe bag. They make a great quick addition to a keto deviled egg salad plate or as a crunchy topping for soup.
What to Serve With Your Pepperoni Cheese Crisps
These crisps are incredibly versatile. They are the perfect “scooper” for a high protein crack dip or a creamy buffalo dip. If you are hosting a party, serve them alongside air fryer buffalo cauliflower bites for a complete spread of low-carb appetizers.
For a lighter lunch, crumble them over a fresh Caesar salad instead of croutons. The charred pepperoni adds a smoky depth that pairs beautifully with creamy dressings and crisp romaine lettuce.
Frequently Asked Questions
Absolutely. Since the only ingredients are cheese and cured meat, they contain almost zero carbohydrates and are high in protein and healthy fats, making them perfect for a ketogenic diet.
Yes! Cook them at 380°F (190°C) for about 5-7 minutes. However, be careful as the light pepperoni slices can sometimes fly off the cheese in high-convection air fryers; you may need to secure them with a toothpick.
The lacy texture comes from using high-quality shredded parmesan and not packing the mounds too tightly. Spreading the cheese shreds thinly allows the heat to create small perforations as the cheese melts and bubbles.
Thinly sliced, deli-style pepperoni is best. Look for pepperoni with natural casings if possible, as these are scientifically more likely to curl into ‘cups’ when exposed to high heat.
Sogginess is usually caused by not letting the crisps cool long enough on the baking sheet. They need at least 3-5 minutes to harden as the cheese proteins set. Also, ensure you are using shredded parmesan rather than the powdered variety.

The Official Pepperoni Cheese Crisps Recipe Card
Pepperoni Cheese Crisps: The Ultimate 2-Ingredient Crispy Keto Pizza Snack
Ingredients
Equipment
Method
- Preheat your oven to 400°F (200°C). Line a baking sheet with crumpled parchment paper.
- Place 1 tablespoon mounds of shredded parmesan onto the parchment, spaced 2 inches apart. Flatten slightly into lacy discs.
- Press one pepperoni slice into the center of each cheese mound. Garnish with oregano and black pepper.
- Bake for 8-10 minutes until the cheese is bubbly and golden-brown with dark charred edges, and the pepperoni rims are curled.
- Let rest on the pan for 5 minutes until firm and crispy before removing to a wire rack.
Notes
Ensure the oven is fully preheated to achieve the charred edges.
Show Off Your Crisps!
Did you achieve those perfect curled pepperoni rims? We want to see! Save this recipe to your Keto Snacks or Party Appetizers board on Pinterest so you never lose it. If you made these, please leave a 5-star rating in the recipe card above and drop a photo in the comments below! Following @toastpantry on Pinterest helps us keep bringing you these ultra-visual, easy-to-make recipes every single week. Happy snacking!