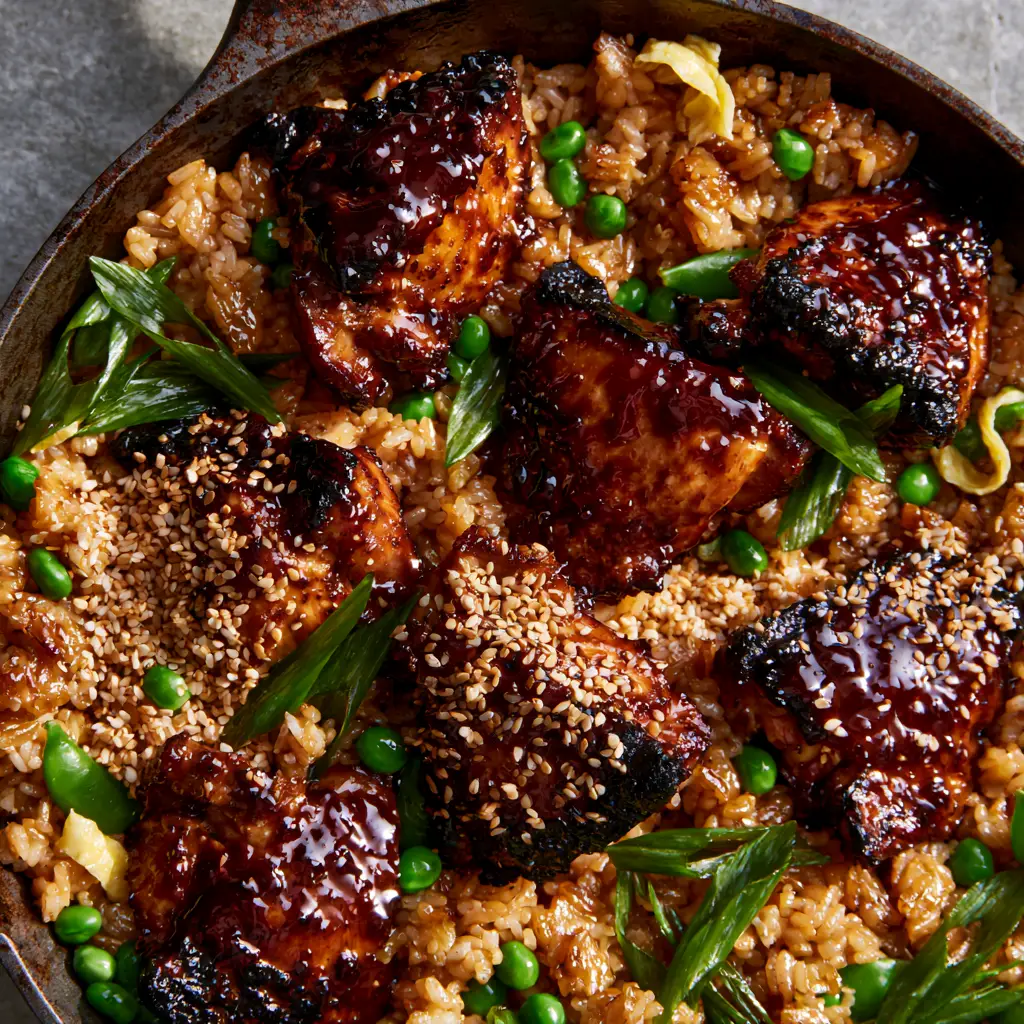
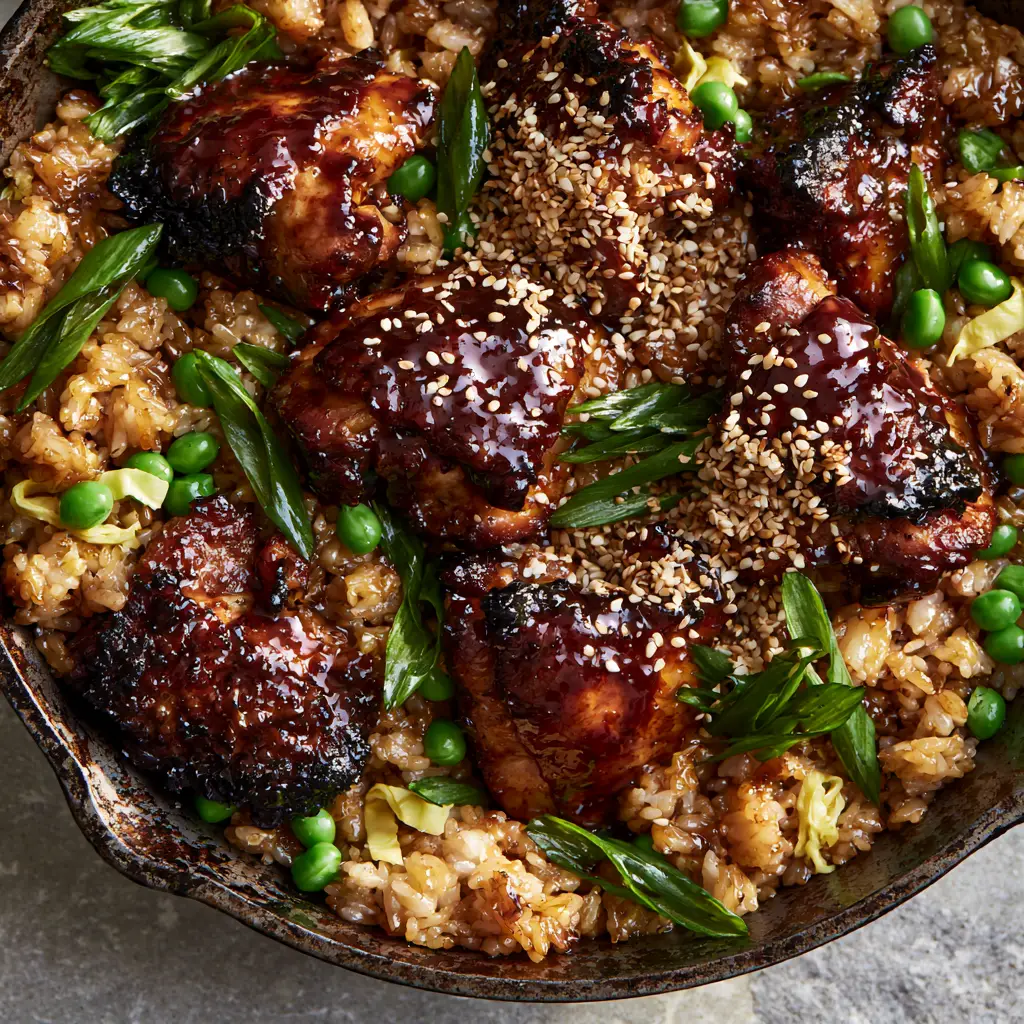
Experience the ultimate fusion of smoky cast-iron char and sweet, savory Japanese flavors with this restaurant-quality Japanese BBQ chicken fried rice. This isn’t your standard takeout; it is a meticulously crafted bowl featuring juicy, seared chicken thighs coated in a dark, mirror-like umami glaze that clings to every fluffy grain of golden short-grain rice.
The visual appeal is just as striking as the taste, with vibrant emerald-green sweet peas, soft ribbons of scrambled egg, and a heavy snowfall of toasted white sesame seeds. Whether you are a fan of traditional hibachi or just looking for a way to elevate your weeknight dinner, this recipe delivers the “wok hei” breath of the pan right in your own kitchen.
Using a rustic black cast iron skillet is the secret to achieving those characteristic charred edges on the chicken and the glistening, individual rice grains that stay distinct and never mushy. Let’s dive into the science of the perfect sear and the aromatics that make this dish a household favorite.
The Anatomy of the Perfect Umami-Packed Fried Rice
- Mirror-Like Glaze: A thick, dark Japanese BBQ sauce provides a lacquered finish to the chicken thighs, creating deep mahogany tones and caramelized edges.
- Golden Short-Grain Rice: Unlike long-grain varieties, short-grain rice offers a chewy, satisfying texture that absorbs the dark soy glaze droplets without losing its structural integrity.
- Soft-Scrambled Egg Ribbons: These delicate, bright yellow ribbons provide a creamy contrast to the smoky, seared elements of the dish.
- Vibrant Textural Accents: Freshly sliced scallions and steamed sweet peas offer a pop of color and a burst of garden-fresh sweetness in every bite.
Essential Elements for the Ultimate Savory Glaze
To achieve the visual and flavor profile of authentic Japanese BBQ chicken fried rice, your ingredient selection is paramount. We focus on high-moisture chicken thighs and specific sauces that caramelize at high temperatures.
Boneless Skinless Chicken Thighs (1.5 lbs / 680g): Thighs are essential because they remain juicy under the intense heat of the cast iron, allowing for a heavy sear without drying out. Chop them into uniform 1-inch chunks to ensure even cooking and maximum surface area for the glaze.
Cold, Day-Old Short-Grain Rice (4 cups / 600g): Freshly cooked rice contains too much moisture, which leads to clumping. Using chilled, day-old rice ensures the grains stay “fluffy and individual” as described in our culinary blueprint.
Japanese BBQ Sauce (1/2 cup / 120ml): Use a high-quality sauce featuring soy, mirin, ginger, and garlic. This provides the “thick, dark, mirror-like umami glaze” that defines the dish’s aesthetic.
Avocado Oil or Grapeseed Oil (3 tbsp / 45ml): These oils have high smoke points, which are necessary for searing the chicken until charred edges appear without the oil breaking down or tasting bitter.
Toasted White Sesame Seeds (2 tbsp / 18g): Beyond flavor, these add the “fine texture” and visual highlights seen in professional food photography.
Dark Soy Sauce (1 tbsp / 15ml): This is used sparingly as finishing “droplets” to provide deep color and a punch of salty depth just before serving.
Fresh Scallions and Sweet Peas: One bunch of scallions (finely sliced) and 1 cup (150g) of sweet peas provide the “emerald-green” and “bright green” visual markers that balance the dark tones of the meat.
Tools Required for Professional Results
To replicate the “extreme close-up” quality of this dish, a 12-inch (30cm) Cast Iron Skillet is non-negotiable. The heat retention of cast iron allows the rice to “glisten” and sear rather than steam.
You will also need a Flexible Metal Spatula to scrape up the fond (browned bits) from the bottom of the pan. This fond is packed with flavor and helps create the “golden-brown” rice grain color.
Mastering the Sear: Step-by-Step Instructions
Preparation of the Chicken and Aromatics
Pat the chicken thigh chunks completely dry with paper towels. Any surface moisture will prevent the “visible charred edges” we are aiming for. Season lightly with salt, but remember the Japanese BBQ sauce is already rich in sodium.
Whisk three large eggs with a pinch of salt. In a separate bowl, ensure your day-old rice is broken up into individual grains so there are no large clumps before it hits the pan.
Achieving the Mirror-Like Glaze
Heat your cast iron skillet over medium-high heat until a drop of water flicked onto the surface dances and evaporates instantly. Add 2 tablespoons (30ml) of oil and swirl to coat.
Add the chicken in a single layer. Do not crowd the pan; work in batches if necessary. Let the chicken sit undisturbed for 3 minutes to develop a deep golden-brown crust.
Pour in half of the Japanese BBQ sauce. As the sugars in the sauce hit the heat, they will bubble and thicken, creating that “sticky sauce” effect. Toss the chicken until fully coated and the sauce has reduced to a thick, dark lacquer. Remove the chicken from the pan and set aside.
Creating the Fluffy Golden Rice and Egg Ribbons
Wipe the skillet briefly if there are burnt sugar bits, but keep the savory oil. Add the remaining tablespoon of oil. Pour in the beaten eggs, swirling the pan to create a thin sheet. Once just set, use your spatula to slice them into “ribbons” and remove them from the pan.
Add the chilled rice to the hot skillet. Press it down firmly and let it “fry” for 2 minutes before tossing. This creates the “golden-brown and glistening” texture. Stir in the steamed sweet peas and the remaining Japanese BBQ sauce, tossing constantly to ensure every grain is coated.
The Final Assembly and Finishing Touches
Return the glazed chicken and egg ribbons to the skillet. Toss everything together over high heat for 60 seconds. This final flash of heat creates the “deep shadows in the crevices” by slightly crisping the outer edges of the rice.
Turn off the heat. Drizzle the dark soy glaze droplets over the top. Garnish with a “heavy sprinkle” of toasted white sesame seeds and the vibrant emerald-green scallion slices. Serve immediately directly from the skillet for that rustic, handheld smartphone photo aesthetic.
Expert Tips for Success
- Cold Rice is King: If you don’t have day-old rice, spread freshly cooked rice on a baking sheet and place it in front of a fan for 20 minutes to dehydrate the surface.
- The Sugar Warning: Japanese BBQ sauce contains sugar, which burns easily. If the pan gets too dark too fast, lower the heat slightly and add a teaspoon of water to deglaze.
- Vegetable Timing: Steaming the sweet peas separately before adding them to the rice ensures they stay “bright green” and don’t turn a dull olive color from overcooking.
- High Heat, Fast Hands: Fried rice is a fast process. Have all ingredients measured and ready (mise en place) before the first drop of oil hits the pan.
Storage, Reheating, and Freezing
This Japanese BBQ chicken fried rice keeps exceptionally well in the refrigerator for up to 3 days. Store in an airtight container to prevent the rice from drying out further. For the best results, reheat in a hot skillet with a teaspoon of water to re-steam the grains.
If you wish to freeze this dish, allow it to cool completely before placing it in a freezer-safe bag. It can be frozen for up to 2 months. Thaw in the fridge overnight before reheating. Avoid the microwave if possible, as it can make the chicken rubbery.
Perfect Pairings and Serving Suggestions
While this dish is a complete meal on its own, it pairs beautifully with light, acidic sides to cut through the rich umami glaze. Consider serving it alongside a vibrant corn salad for a fusion twist or some quick stir-fried greens.
If you are hosting a larger gathering, these marinated steak kabobs or savory pork skewers make excellent protein additions. For dessert, a light and airy mango mousse cake or a refreshing shaved ice treat balances the saltiness of the BBQ sauce perfectly.
Frequently Asked Questions
Absolutely! Replace the chicken with firm cubed tofu or mushrooms, and follow the same searing and glazing process for a similarly rich, umami-packed experience.
Yes, but short-grain rice provides a signature chewy texture that is traditional in Japanese cuisine. If using long-grain (like Jasmine), ensure it is very dry and day-old to avoid a mushy result.
The secret is the high sugar content in the Japanese BBQ sauce combined with high heat. This creates a Maillard reaction and caramelization that forms a thick lacquer on the meat.
Most Japanese BBQ sauces, like the popular Bachan’s brand, are a blend of soy sauce, mirin, sugar, ginger, garlic, and toasted sesame oil, creating a flavor profile similar to teriyaki but with more depth and less thickness.
Sticking usually happens if the pan isn’t hot enough or if there isn’t enough oil. Ensure your skillet is preheated until shimmering and that your rice is cold and dry before adding it.
The Ultimate Japanese BBQ Chicken Fried Rice Recipe
Japanese BBQ Chicken Fried Rice with Caramelized Umami Glaze
Ingredients
Equipment
Method
- Pat the chicken thighs dry with paper towels to ensure a crisp sear. Break up the cold rice into individual grains.
- Heat 1 tbsp oil in the skillet. Pour in eggs, cook until just set, slice into ribbons, and remove.
- Add 1 tbsp oil to the skillet over medium-high heat. Sear chicken chunks until charred edges appear (about 3-4 minutes).
- Add half of the Japanese BBQ sauce. Toss until the chicken is coated in a thick, mirror-like umami glaze. Remove chicken.
- Add final tbsp of oil and the rice. Press down and fry until golden-brown and glistening. Stir in peas and remaining sauce.
- Return chicken and eggs to the pan. Toss over high heat for 60 seconds. Finish with dark soy glaze droplets, sesame seeds, and scallions.
Notes
Wipe the skillet between the chicken and rice if the sugar begins to burn.
Closing & Call to Action
This Japanese BBQ chicken fried rice brings the high-end hibachi experience directly to your dinner table with minimal effort and maximum flavor. The combination of the charred chicken thighs and the glistening short-grain rice creates a sensory experience that is hard to beat.
If you enjoyed this recipe, please leave a comment below and let us know how your skillet sear turned out! Don’t forget to sign up for our newsletter for more professional culinary guides. Please share your creations and follow us on Pinterest for more daily inspiration!