There is a specific kind of magic that happens when a cookie transcends the ordinary and becomes a textural masterpiece. These Rippled Chocolate Chip Cookies are exactly that—a viral-worthy sensation that combines a soft, buttery center with crisp, lacy, toffee-colored edges. If you have been searching for that giant, thin, bakery-style cookie with deep, concentric circular ripples, your search ends here.
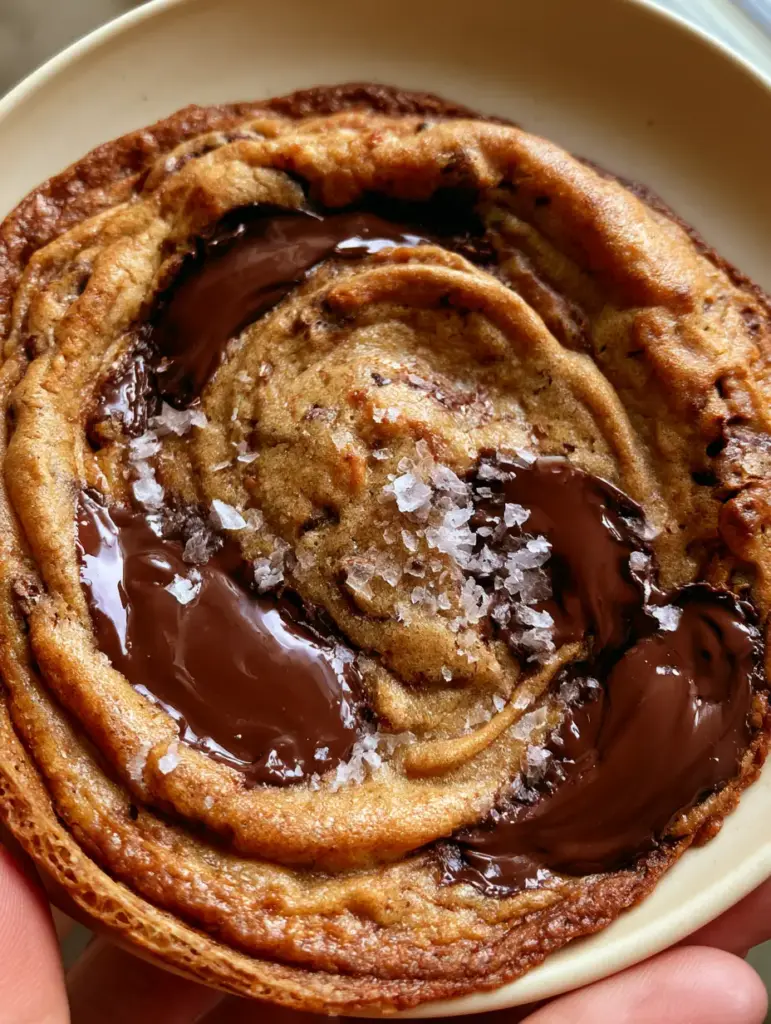
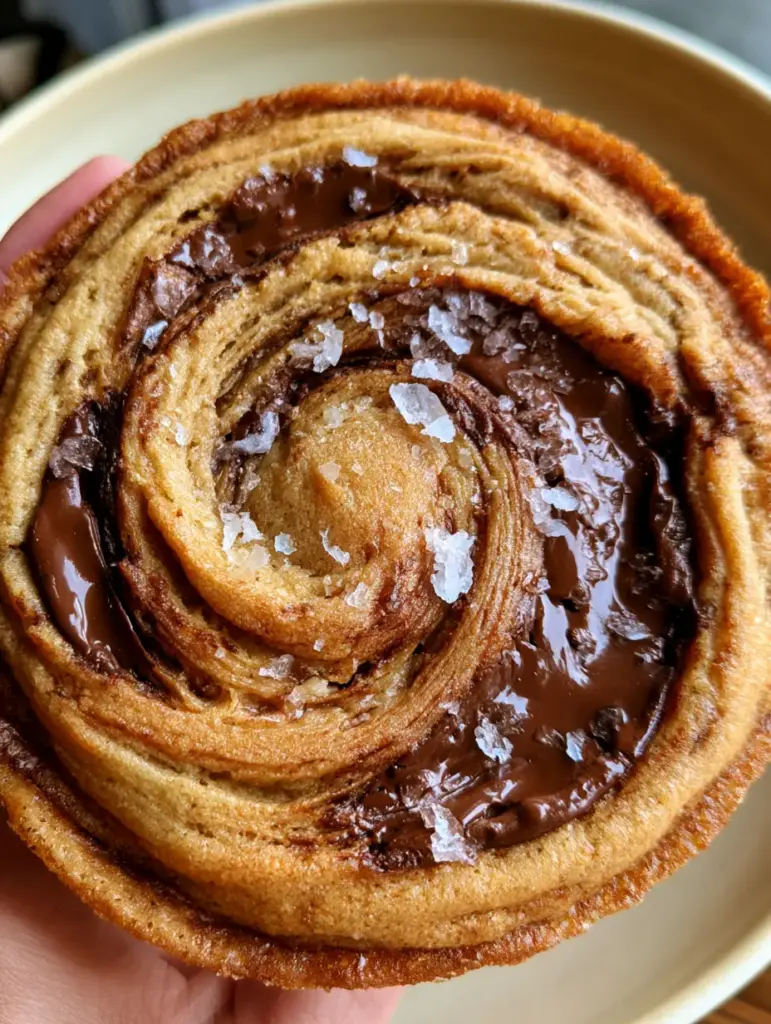
The visual appeal of these cookies is undeniable. Imagine waves of golden-brown caramelized dough undulating across a massive surface, punctuated by glossy, molten pools of dark chocolate that have sunken perfectly into the ripples. To finish, a light scattering of oversized flaky sea salt crystals catches the light, promising a sophisticated balance to the rich, sugary dough.
Achieving this “pan-banging” effect isn’t just about luck; it is a culinary science that relies on the precise collapse of air pockets during the baking process. In this guide, we will dive deep into the mechanics of the ripple and the importance of using high-quality chocolate to achieve those iconic molten craters. Whether you are a fan of chewy brown sugar cookies or you prefer the luxury of salted butter cookie secrets, this recipe will become your new gold standard.
The Irresistible Allure of the Rippled Cookie Texture
- Concentric Ripples: Created through a unique pan-banging technique that forced the dough to spread and ripple outward.
- Molten Chocolate Pools: We skip the chips and use hand-chopped dark chocolate bars to create glossy, sunken reservoirs of cocoa.
- Toffee-Laced Edges: High-quality sugars and precise bake times create a thin, lacy perimeter that snaps with caramelized flavor.
- Buttery Soft Core: Despite the crisp edges, the center remains tender and rich, offering a multi-sensory experience in every bite.
Essential Ingredients for the Perfect Rippled Cookie
Unsalted Butter (225g / 1 cup): Use high-quality butter softened to room temperature. It provides the foundational fat that allows the cookie to spread effectively while creating that signature buttery center.
Granulated Sugar (200g / 1 cup): This is crucial for the structure and the crispness of the edges. It helps the cookies spread and creates the “lacy” texture we are looking for.
Dark Brown Sugar (220g / 1 cup packed): The molasses content in dark brown sugar is what gives us those caramelized toffee edges. It also keeps the center moist and chewy. If you love deep flavors, check out our guide on homemade chocolate chip cookies recipe fundamentals.
Large Egg (50g): The egg acts as the primary emulsifier, binding the fats and sugars together. Ensure it is at room temperature for the smoothest dough integration.
Vanilla Extract (10ml / 2 tsp): Use pure vanilla extract to enhance the aromatic profile of the caramelized dough. It acts as a bridge between the salt and the sugar.
All-Purpose Flour (250g / 2 cups): This provides the necessary protein structure. We use just enough to hold the ripples together without making the cookie cakey.
Baking Soda (5g / 1 tsp): The primary leavening agent that reacts with the acidic brown sugar to create the initial rise before the “bang” collapses it into ripples.
Dark Chocolate Bar (225g / 8 oz): Use a bar with at least 60% cocoa. Chopping it by hand ensures varying sizes of chocolate, leading to those deep, glossy, molten pools visible in the ripples.
Flaky Sea Salt (for finishing): Large crystals, like Maldon, are essential. They provide a high-contrast texture and a burst of salinity that cuts through the richness.
The Science of the Ripple: Why Pan-Banging Works
The secret to the Rippled Chocolate Chip Cookies lies in the intentional collapse of the cookie while it is in the oven. When the dough is placed in a hot oven, the edges set first while the center continues to rise due to the baking soda and steam.
By lifting the pan and dropping it (banging it) against the oven rack, you force that air to escape. This causes the center to fall, pushing the set edges outward and creating a new “wave” of dough. Repeating this every few minutes results in the beautiful concentric circles seen in professional bakery photos.
This method is a favorite for those who enjoy a crunchy snack recipe but still want the indulgence of a soft dessert. It is a masterclass in textural contrast, moving from the snap of the rim to the melt-in-your-mouth middle.
Must-Have Equipment for Bakery-Style Results
To achieve the results seen in our
You will also need high-quality parchment paper or a silicone baking mat. However, for the best ripples, parchment paper is preferred as it allows the dough to slide slightly more during the “banging” process. A large 3-ounce cookie scoop will ensure every cookie is giant and uniform.
Mastering the Rippled Chocolate Chip Cookies Step-by-Step
1. Creaming for Structure
In a large bowl, cream together the softened butter, granulated sugar, and dark brown sugar. Beat on medium-high for at least 3 minutes until the mixture is pale and fluffy. This aeration is the first step in creating the height needed for the future ripples.
2. Integrating Liquid Ingredients
Add the egg, water (1 tbsp), and vanilla extract. Beat until just combined. The small addition of water is a secret trick that helps the dough spread further, ensuring the cookie remains thin and lacy at the edges.
3. Folding the Dry Ingredients
Sift the flour, baking soda, and fine salt into the wet mixture. Use a spatula to fold gently. Over-mixing at this stage will develop too much gluten, which will prevent the dough from rippling smoothly. Stop when only a few streaks of flour remain.
4. The Chocolate Hand-Chop
Roughly chop your dark chocolate bar into chunks ranging from dust to half-inch pieces. Fold these into the dough. The smaller shards will melt into the dough, while the larger chunks will create those iconic molten pools that sink into the waves of the cookie.
5. Chilling the Dough
Scoop the dough into massive balls (about 100g each) and place them on a tray. Chill in the freezer for 15 minutes. This ensures the center stays cold while the edges start to bake, which is essential for the “bang” to work effectively.
6. The Pan-Banging Technique
Place two dough balls on a large lined baking sheet, spaced far apart. Bake at 350°F (175°C) for 10 minutes. When the cookies have puffed up in the center, lift the side of the baking sheet about 4 inches and let it drop against the oven rack. You will see the center collapse. Repeat this every 2 minutes for the remainder of the bake time (about 15-18 minutes total).
7. The Final Flourish
Remove the cookies when the edges are deep golden-brown and the centers are still slightly pale. Immediately sprinkle with oversized flaky sea salt. The heat from the chocolate pools will keep the salt crystals in place as they cool.
Expert Tips for Success
- Don’t Crowd the Pan: These cookies spread significantly. Only bake 2 or 3 at a time on a standard sheet to avoid them merging into one giant ripple.
- Use Room Temp Ingredients: Cold eggs or butter will break the emulsion, leading to a greasy cookie rather than a buttery, soft center.
- Quality Chocolate Matters: Avoid standard chips, which contain stabilizers that prevent melting. Chopped bars are the only way to get those glossy, sunken pools.
- The “Bang” Height: Don’t be afraid to give it a real drop! The force is what creates the deep, high-contrast textures in the dough waves.
Storage, Reheating, and Freezing Advice
These cookies are best enjoyed fresh when the chocolate is still molten. However, you can store them in an airtight container at room temperature for up to 3 days. To regain that “just baked” feel, pop a cookie in the microwave for 10 seconds to re-melt the chocolate pools.
For long-term storage, freeze the pre-scooped dough balls. When a craving hits, you can bake them directly from the freezer—just add 2-3 extra minutes to the initial bake time before you start your first round of pan-banging.
What to Serve with Rippled Cookies
These cookies are a decadent treat on their own, but they also pair beautifully with other textural snacks. If you are hosting a get-together, consider serving them alongside salty snack recipes to balance the sweetness. For a complete dessert spread, a chocolate cream cheese danish offers a different but complementary cocoa experience.
If you prefer a drink to wash it all down, a cold glass of milk is the classic choice, but a coconut key lime pie smoothie provides a refreshing, acidic contrast to the rich, toffee-flavored dough.
Frequently Asked Questions
While you can, we don’t recommend it for this specific recipe. Chocolate chips contain stabilizers that prevent them from melting into the ‘molten pools’ seen in the photos. Hand-chopping a high-quality bar is essential for that glossy, sunken effect.
Yes. Granulated sugar provides the structure and crispness for the lacy edges, while brown sugar provides the moisture and molasses for the soft center and toffee flavor. Using only one will ruin the ‘ripple’ texture.
Because these giant cookies spread significantly to create the ripples, only bake 2 to 3 cookies per large baking sheet. Crowding the pan will cause them to run into each other and lose their circular shape.
This often happens if you use dark-colored baking sheets, which absorb more heat. Use light-colored aluminum pans and ensure your oven temperature is accurate. If edges brown too quickly, lower the heat by 15 degrees.
Ripples usually fail to form if the dough is too warm or if the pan isn’t dropped with enough force. Ensure you freeze the dough balls for 15 minutes before baking and drop the pan from at least 4 inches high to collapse the air pockets.
The Ultimate Rippled Chocolate Chip Cookie Recipe

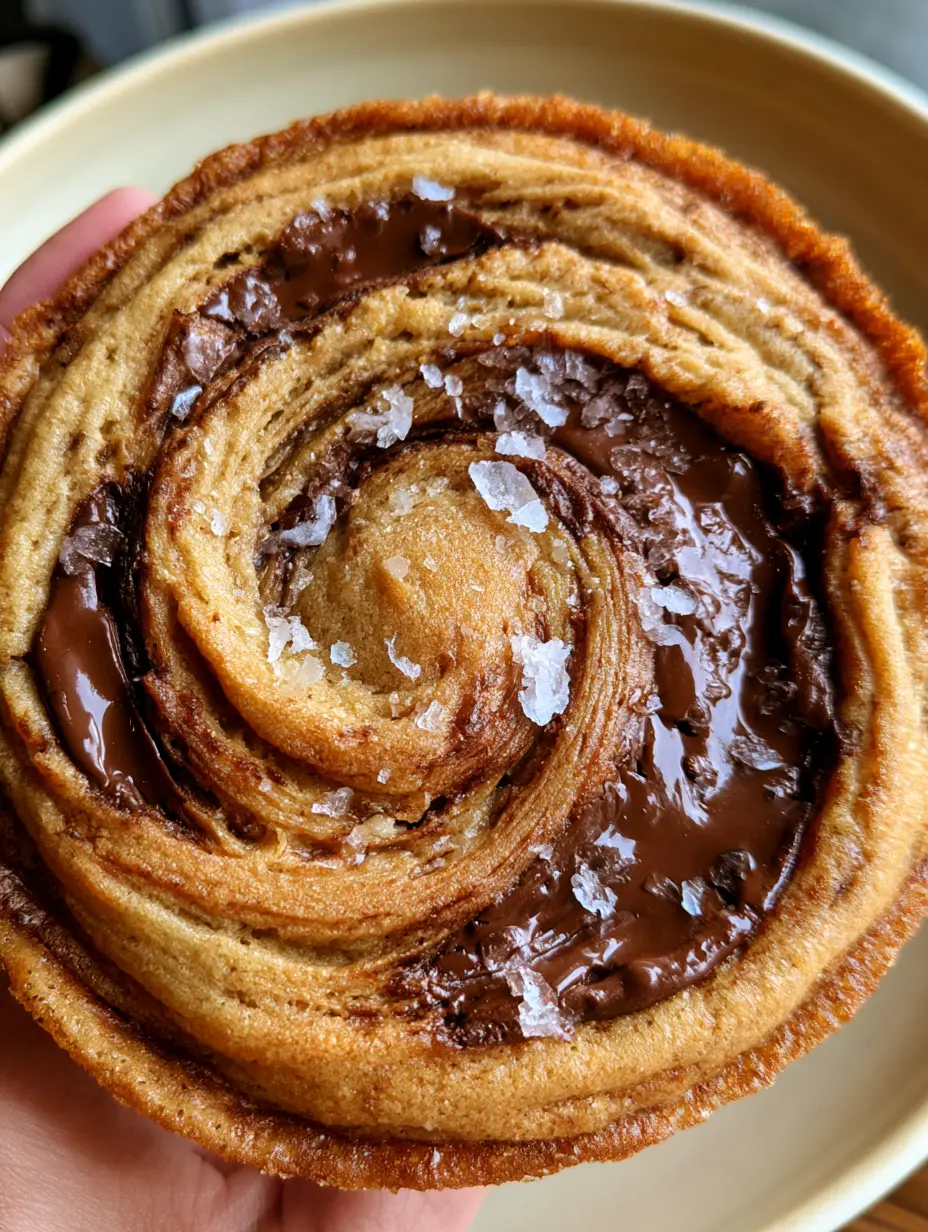
Rippled Chocolate Chip Cookies: The Ultimate Pan-Banging Recipe for Molten Dark Chocolate Pools
Ingredients
Equipment
Method
- Cream butter and both sugars in a stand mixer for 3 minutes until pale and fluffy.
- Add the egg, vanilla, and 1 tablespoon of water, beating until smooth and fully incorporated.
- Fold in the flour, baking soda, and fine salt until just a few streaks of flour remain.
- Fold in the hand-chopped dark chocolate chunks, ensuring even distribution.
- Scoop 100g balls of dough and chill in the freezer for 15 minutes.
- Bake at 350°F (175°C) for 10 minutes until the center is puffed and edges are set.
- Lift the pan 4 inches and drop it against the oven rack. Repeat every 2 minutes as ripples form.
- Remove when edges are golden-brown. Immediately top with flaky sea salt.
Notes
Do not skip the 15-minute freezer chill; it is vital for the ripple structure.
Conclusion: Join the Rippled Cookie Movement
Mastering the Rippled Chocolate Chip Cookies is a rite of passage for any serious home baker. The combination of the thin, lacy edges and the glossy dark chocolate pools makes for a cookie that looks as incredible as it tastes. The high-contrast textures and the sophisticated hit of flaky sea salt ensure these will be the star of any dessert table.
We would love to see your ripples! Share your baking photos and tag us, or leave a comment below with your results. For more daily kitchen inspiration and visually stunning recipes, be sure to follow us on Pinterest and sign up for our newsletter.