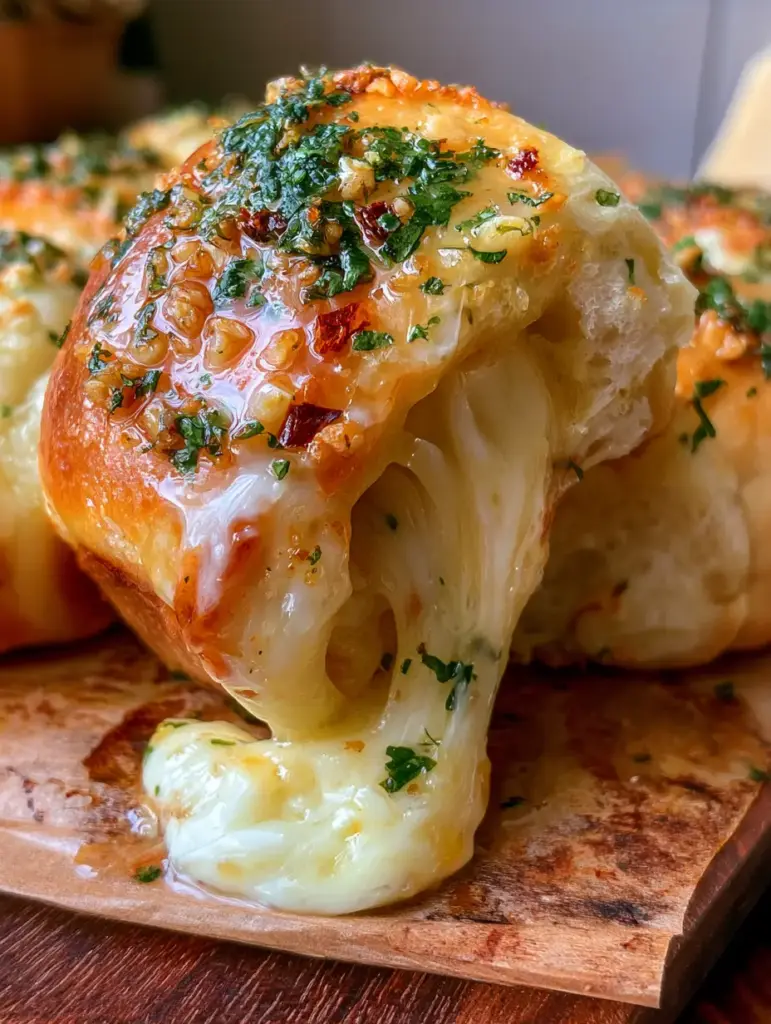
There is nothing quite like the aroma of a freshly baked cheesy garlic snack wafting through the kitchen. Imagine a cluster of golden-brown, soft, and airy dough rolls, each glistening with a heavy glaze of melted salted butter.
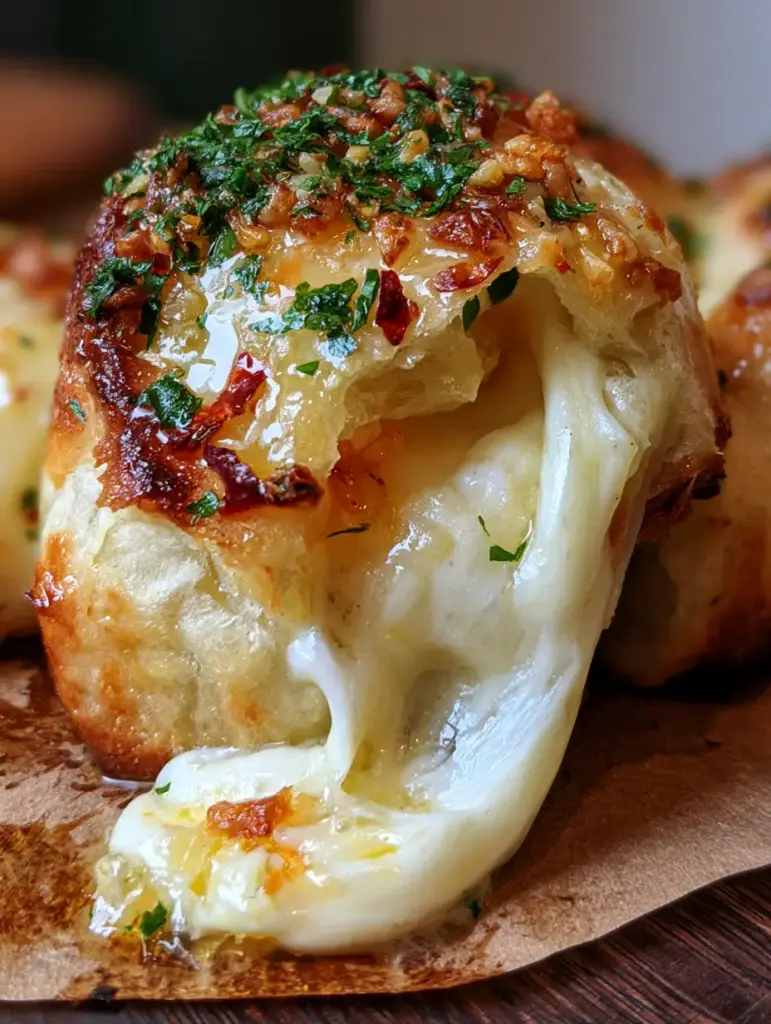
When you pull a single roll away, you are met with an incredibly long, thick, and molten white mozzarella cheese stretch that seems to defy gravity. This is the ultimate comfort food, designed for those who appreciate the finer details of a perfect crust and a savory, garlicky finish.
Whether you are hosting a game night or looking for a decadent afternoon treat, this recipe delivers on every sensory promise. From the crunch of fried minced garlic to the subtle heat of dried red chili flakes, every bite is a masterclass in texture and flavor.
Why You Will Crave This Savory Pull-Apart Masterpiece
- The Ultimate Cheese Pull: We use high-moisture mozzarella hidden inside pillowy dough to ensure every pull is Instagram-worthy.
- Glistening Garlic Glaze: A generous coating of melted salted butter combined with tiny bits of fried minced garlic creates a flavor explosion.
- Textural Harmony: Experience the contrast between the soft, airy interior and the slightly crisp, golden-brown exterior.
- Visual Vibrancy: Finely chopped fresh parsley and red pepper flakes add a pop of color that makes this dish look as good as it tastes.
- Rustic Presentation: Served on oil-stained brown parchment paper, it offers a beautiful, artisanal aesthetic for your table.
The Science Behind the Perfect Cheesy Garlic Snack Ingredients
To achieve the result seen in professional food photography, we need a balance of pantry staples and high-quality fats. Each ingredient serves a specific structural or flavor-focused purpose in this culinary build.
All-Purpose Flour: 3 ½ cups (435g). This provides the necessary gluten structure to hold the heavy mozzarella core without collapsing during the bake.
Warm Water: 1 cup (240ml). Essential for activating the yeast; ensure it is between 105°F and 115°F (40°C-46°C) to avoid killing the leavening agent.
Active Dry Yeast: 2 ¼ tsp (7g). This is the engine of our dough, creating the airy, soft pockets that make the bread so light.
Granulated Sugar: 1 tbsp (12g). A small amount of sugar feeds the yeast and aids in the golden-brown browning of the crust through the Maillard reaction.
Salted Butter: ½ cup (115g). We use salted butter to create that glistening sheen and provide a savory counterpoint to the dough.
Fresh Garlic: 6 cloves (approx. 30g). Minced finely and fried, these bits provide a toasted, nutty flavor rather than the harsh bite of raw garlic.
Low-Moisture Mozzarella: 8 oz (225g). Cut into cubes, this specific cheese melts into those long, thick strands we are looking for.
Fresh Parsley: ¼ cup (15g). Finely chopped vibrant green parsley adds a fresh, herbaceous note that cuts through the richness of the butter.
Dried Red Chili Flakes: 1 tsp (2g). Just two or three small flakes per bite provide a gentle heat that wakes up the palate.
Essential Tools for an Artisanal Bake
You don’t need a commercial kitchen to make a professional-grade cheesy garlic snack, but a few specific tools will help. A heavy-duty baking sheet or a cast-iron skillet provides the even heat distribution required for that uniform golden-brown bottom.
Rustic brown parchment paper is non-negotiable for both the baking process and the final presentation. It prevents sticking while absorbing just enough excess butter to give the bread an authentic, oil-stained “bakery” look.
Finally, a sharp bench scraper or knife is useful for portioning the dough into identical spheres. This ensures that every roll cooks at the same rate, preventing some from burning while others remain raw in the center.
Architecting the Dough: A Step-by-Step Guide
Activating the Yeast and Mixing
Start by blooming your yeast in the warm water with the sugar in a large bowl. Wait about 5-10 minutes until a thick, frothy foam forms on the surface, indicating the yeast is alive and ready to work.
Gradually add the flour and a pinch of salt, mixing until a shaggy dough forms. If you are looking for more inspiration for your next meal, this dough base is as versatile as a vegetable lasagna in its ability to satisfy a crowd.
The Kneading and First Proof
Knead the dough on a lightly floured surface for about 8 minutes until it is smooth and elastic. Place it in a greased bowl, cover with a damp cloth, and let it rise in a warm spot for 60 minutes or until it has doubled in size.
A well-proofed dough is the secret to the “soft and airy” texture described in our visual blueprint. You will know it is ready when you poke it and the indentation stays put rather than springing back immediately.
Stuffing and Shaping the Rolls
Punch the dough down and divide it into 12-15 equal pieces. Flatten each piece slightly, place a cube of mozzarella in the center, and pinch the edges tightly to seal the cheese inside.
Arrange the rolls in a cluster on your rustic parchment paper, leaving about a half-inch of space between them. They will expand and “hug” each other during the second proof and bake, creating that pull-apart effect.
The Golden Glaze: Frying Garlic to Perfection
Preparing the Glistening Butter Topping
While the rolls undergo their second rise, melt the salted butter in a small saucepan over medium-low heat. Add the finely minced garlic bits and fry them gently for 2-3 minutes.
Watch for the garlic to turn a pale golden color; do not let it turn dark brown, or it will become bitter. Stir in the finely chopped parsley and half of the red chili flakes just before removing from the heat.
Baking for Sensory Success
Brush half of the garlic butter over the risen rolls and bake at 375°F (190°C) for 15-18 minutes. You are looking for a specific visual cue: a deep golden-brown top with a slight buttery sheen.
The smell of toasted garlic and browning dough should fill the room. As soon as they come out of the oven, brush them with the remaining butter to ensure they stay glistening and moist.
Pro Tips for the Ultimate Snack Experience
- Don’t Skimp on the Seal: Ensure you pinch the dough firmly around the mozzarella. If there is a hole, the cheese will leak out onto the parchment paper rather than creating that internal molten stretch.
- Temperature Control: Use a thermometer to check your water. If it’s too cold, your cheesy garlic snack will be dense; if it’s too hot, the dough won’t rise at all.
- Fresh vs. Dried: While we use dried chili flakes for heat, always use fresh parsley for the topping. Dried parsley lacks the vibrant green color needed for the visual “pop.”
- Salt Balance: If using unsalted butter, add ¼ tsp of fine sea salt to your garlic mixture to mimic the savory profile of salted butter.
Optimal Storage and Reheating Methods
This snack is best served immediately while the cheese is at its peak “molten” state. However, if you have leftovers, wrap them tightly in foil and store them in the refrigerator for up to 3 days.
To reheat, avoid the microwave as it can make the dough rubbery. Instead, place the rolls in a 350°F (175°C) oven for 5-8 minutes until the cheese inside is melted once again.
For long-term storage, you can freeze the unbaked, stuffed rolls. When the craving hits, simply thaw, proof, and bake as directed for a fresh-from-the-oven experience.
Pairing Your Garlic Snack for a Complete Feast
While this cheesy garlic snack is a star on its own, it pairs beautifully with other dishes to create a full spread. If you are serving this at a party, consider adding a crunchy snack recipe to the table for textural variety.
For those who love a theme, these rolls are the perfect companion to potato side dishes or even a hearty bowl of soup. If you want to lean into the savory-salty vibe, check out our other salty snack recipes.
And of course, every savory feast needs a sweet ending. We highly recommend following this up with a classic homemade chocolate chip cookies recipe to balance the garlic and salt with rich chocolate and sugar.
Frequently Asked Questions
Yes, you can use pre-made pizza dough to save time. However, ensure it is at room temperature before stuffing with cheese to allow for a better rise and softer texture.
Fry the minced garlic in butter over medium-low heat. Remove the pan from the heat as soon as the garlic turns a pale golden color; the residual heat will finish the cooking process.
Absolutely! You can prepare and stuff the rolls, then keep them in the refrigerator for up to 24 hours before baking. Just let them sit at room temperature for 30 minutes before putting them in the oven.
Low-moisture, whole milk mozzarella is the best choice. It has the perfect fat-to-protein ratio that allows it to melt into thick, elastic strands without becoming oily.
Cheese leakage usually happens if the dough isn’t pinched tightly enough or if there are small air bubbles near the surface. Make sure to create a thick, even seal at the bottom of each roll.
The Ultimate Cheesy Garlic Snack Recipe
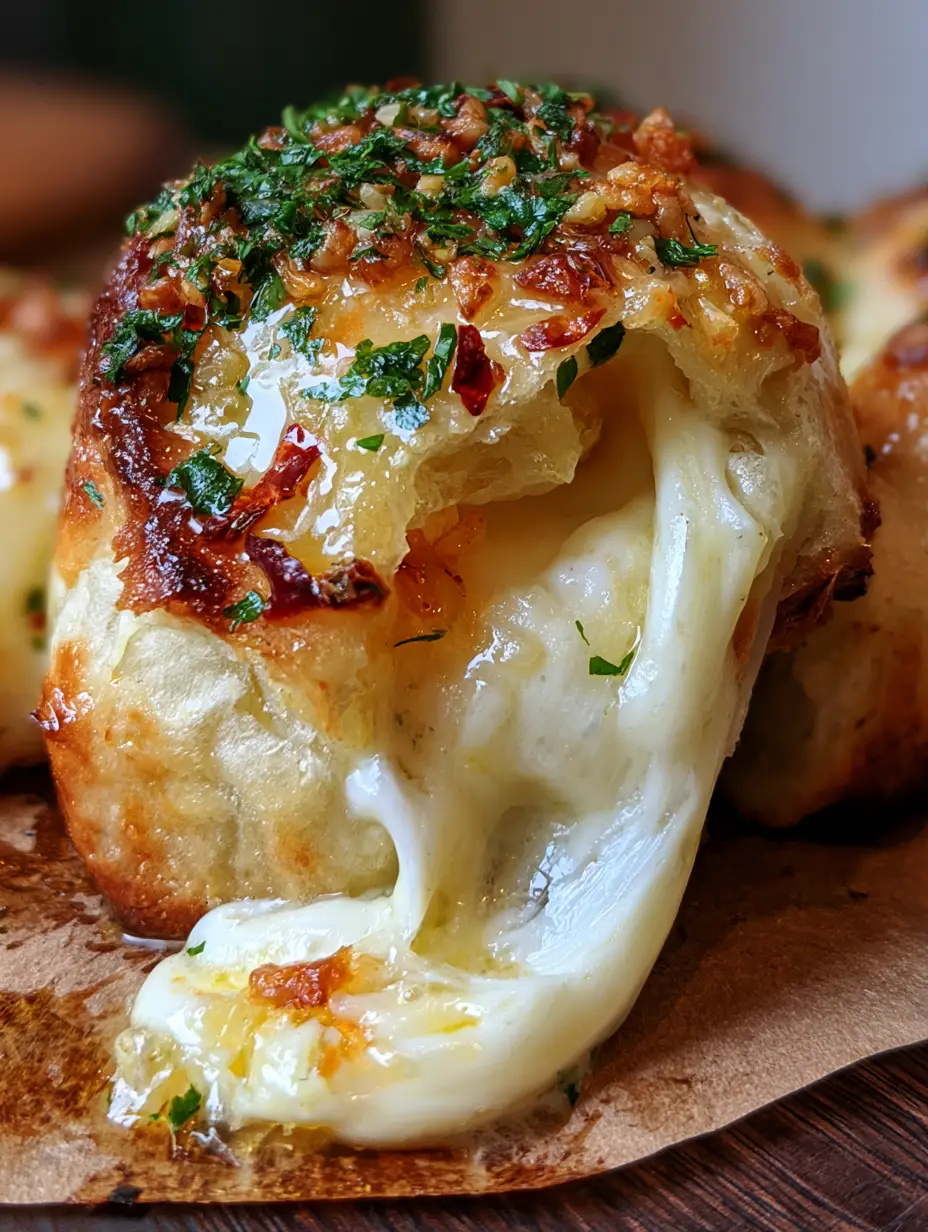
Cheesy Garlic Snack with Epic Molten Mozzarella Cheese Stretch
Ingredients
Equipment
Method
- Combine warm water, sugar, and yeast. Let sit for 10 minutes until frothy.
- Add flour and salt. Knead for 8 minutes until smooth. Let rise for 60 minutes in a warm place.
- Divide dough into 12 balls. Place a mozzarella cube in each and seal tightly.
- Fry minced garlic in butter. Brush over rolls. Bake at 375°F (190°C) for 15-18 minutes until golden brown.
Notes
Ensure the dough is pinched tightly to prevent cheese leakage.

Share the Cheese Stretch!
We hope you enjoy making (and pulling apart!) this decadent cheesy garlic snack. The combination of fried garlic, salted butter, and molten mozzarella is truly a crowd-pleaser that elevates any gathering.
If you made this recipe, we would love to see your epic cheese stretch photos! Leave a comment below or tag us on social media. Don’t forget to save this recipe to your favorite boards on Pinterest so you can find it whenever the craving for garlic bread strikes.